YMCA Web Gate & Occupancy Monitor is a member validation and check in tool used at member check in stations to validate membership status and track member checkin activity and current indoor occupancy.
YMCA Web Gate & Occupancy Monitor is installed on branch check in computers via YMCA IT.
USING YMCA GATE & OCCUPANCY MONITOR
- Scanning in a Member
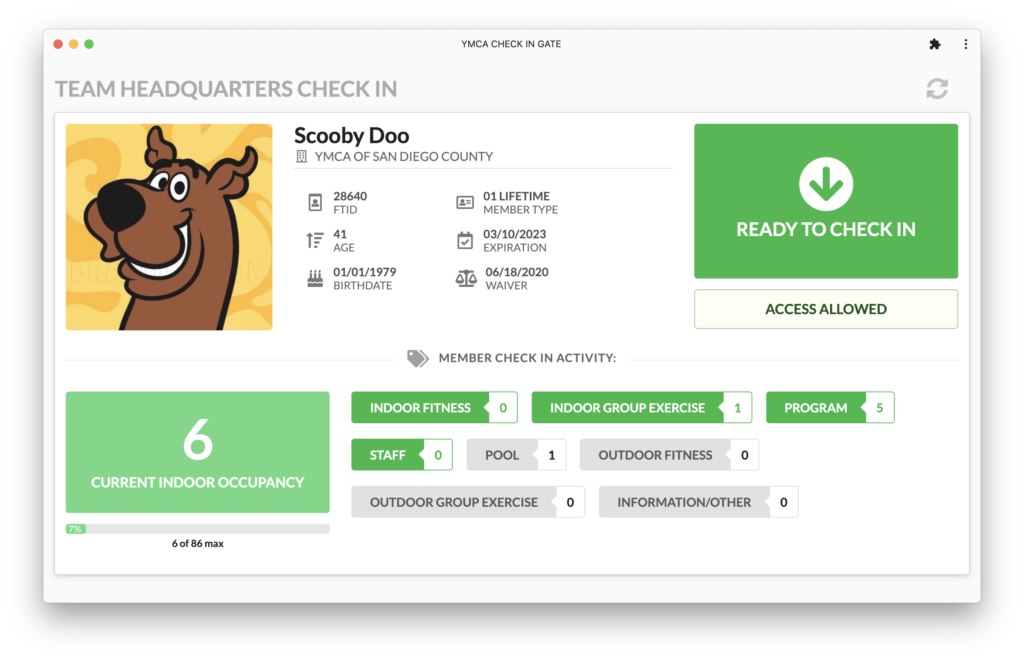
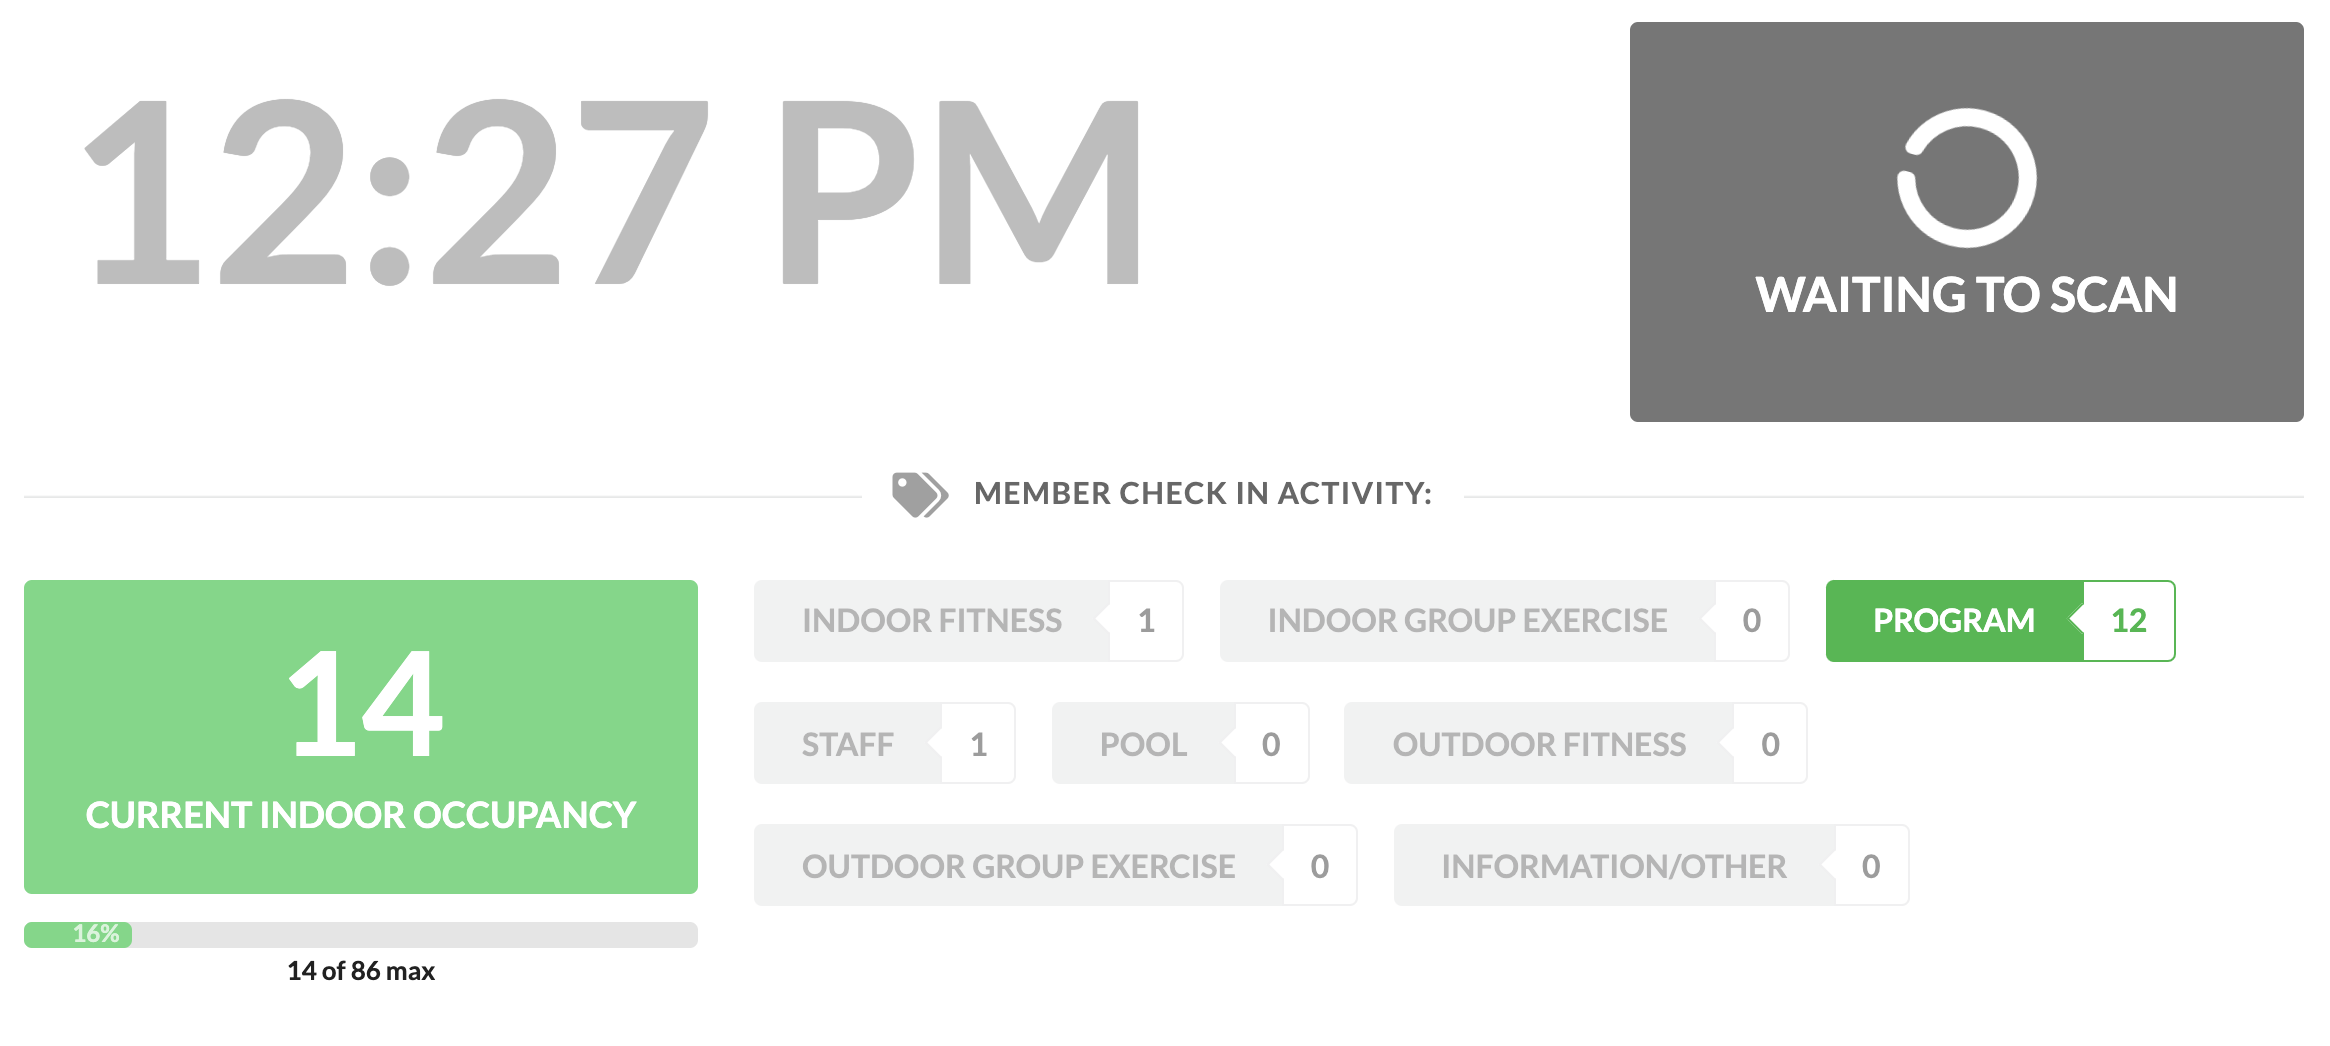
Following a valid membership scan the gate displays the following:
(1) Member image and information
(2) Membership check in readiness indicator
(3) Current indoor occupancy count and overall capacity
(4) Activity check in buttons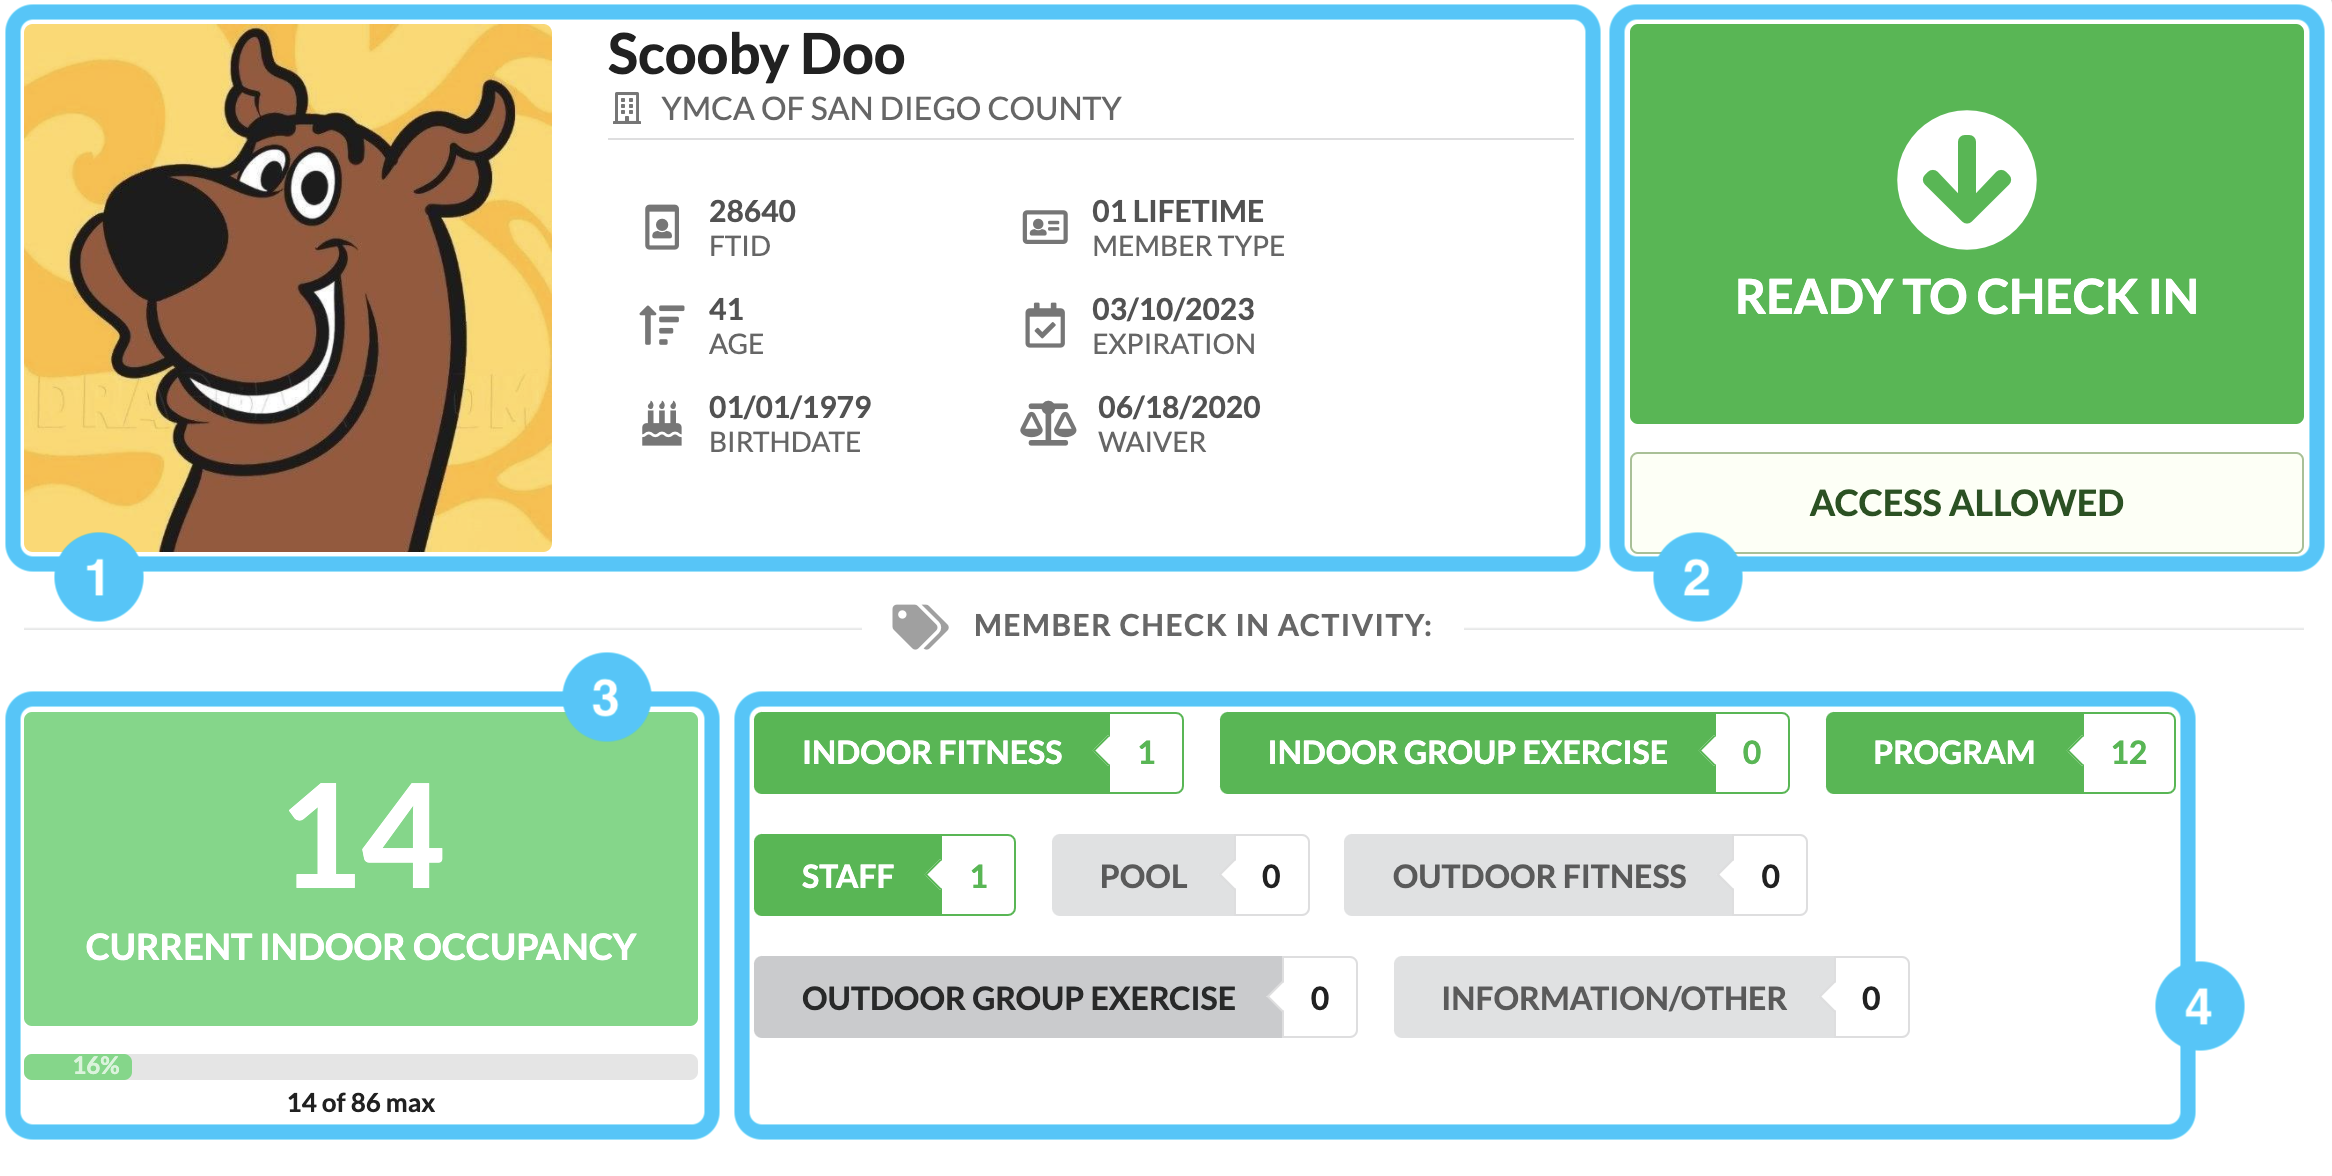
After the member is validated and the gate displays READY TO CHECK IN, an activity must be selected by clicking on an activity check in button in order to complete the member check in.
Buttons marked green represent indoor activities and will be the only activity types that will increase the indoor occupancy monitor.
NOTE: A gate scan for a valid membership is recorded immediately after scanning, however the gate will not allow any further scan until an activity is recorded. - Invalid Gate Scans
Membership validation will fail for a number of reasons including:
– Expiration & Hold
– Missing waiver
– Emergency Message
In an invalid gate scan state, the gate display will show an ACCESS DENIED message in addition to a message explaining the reason: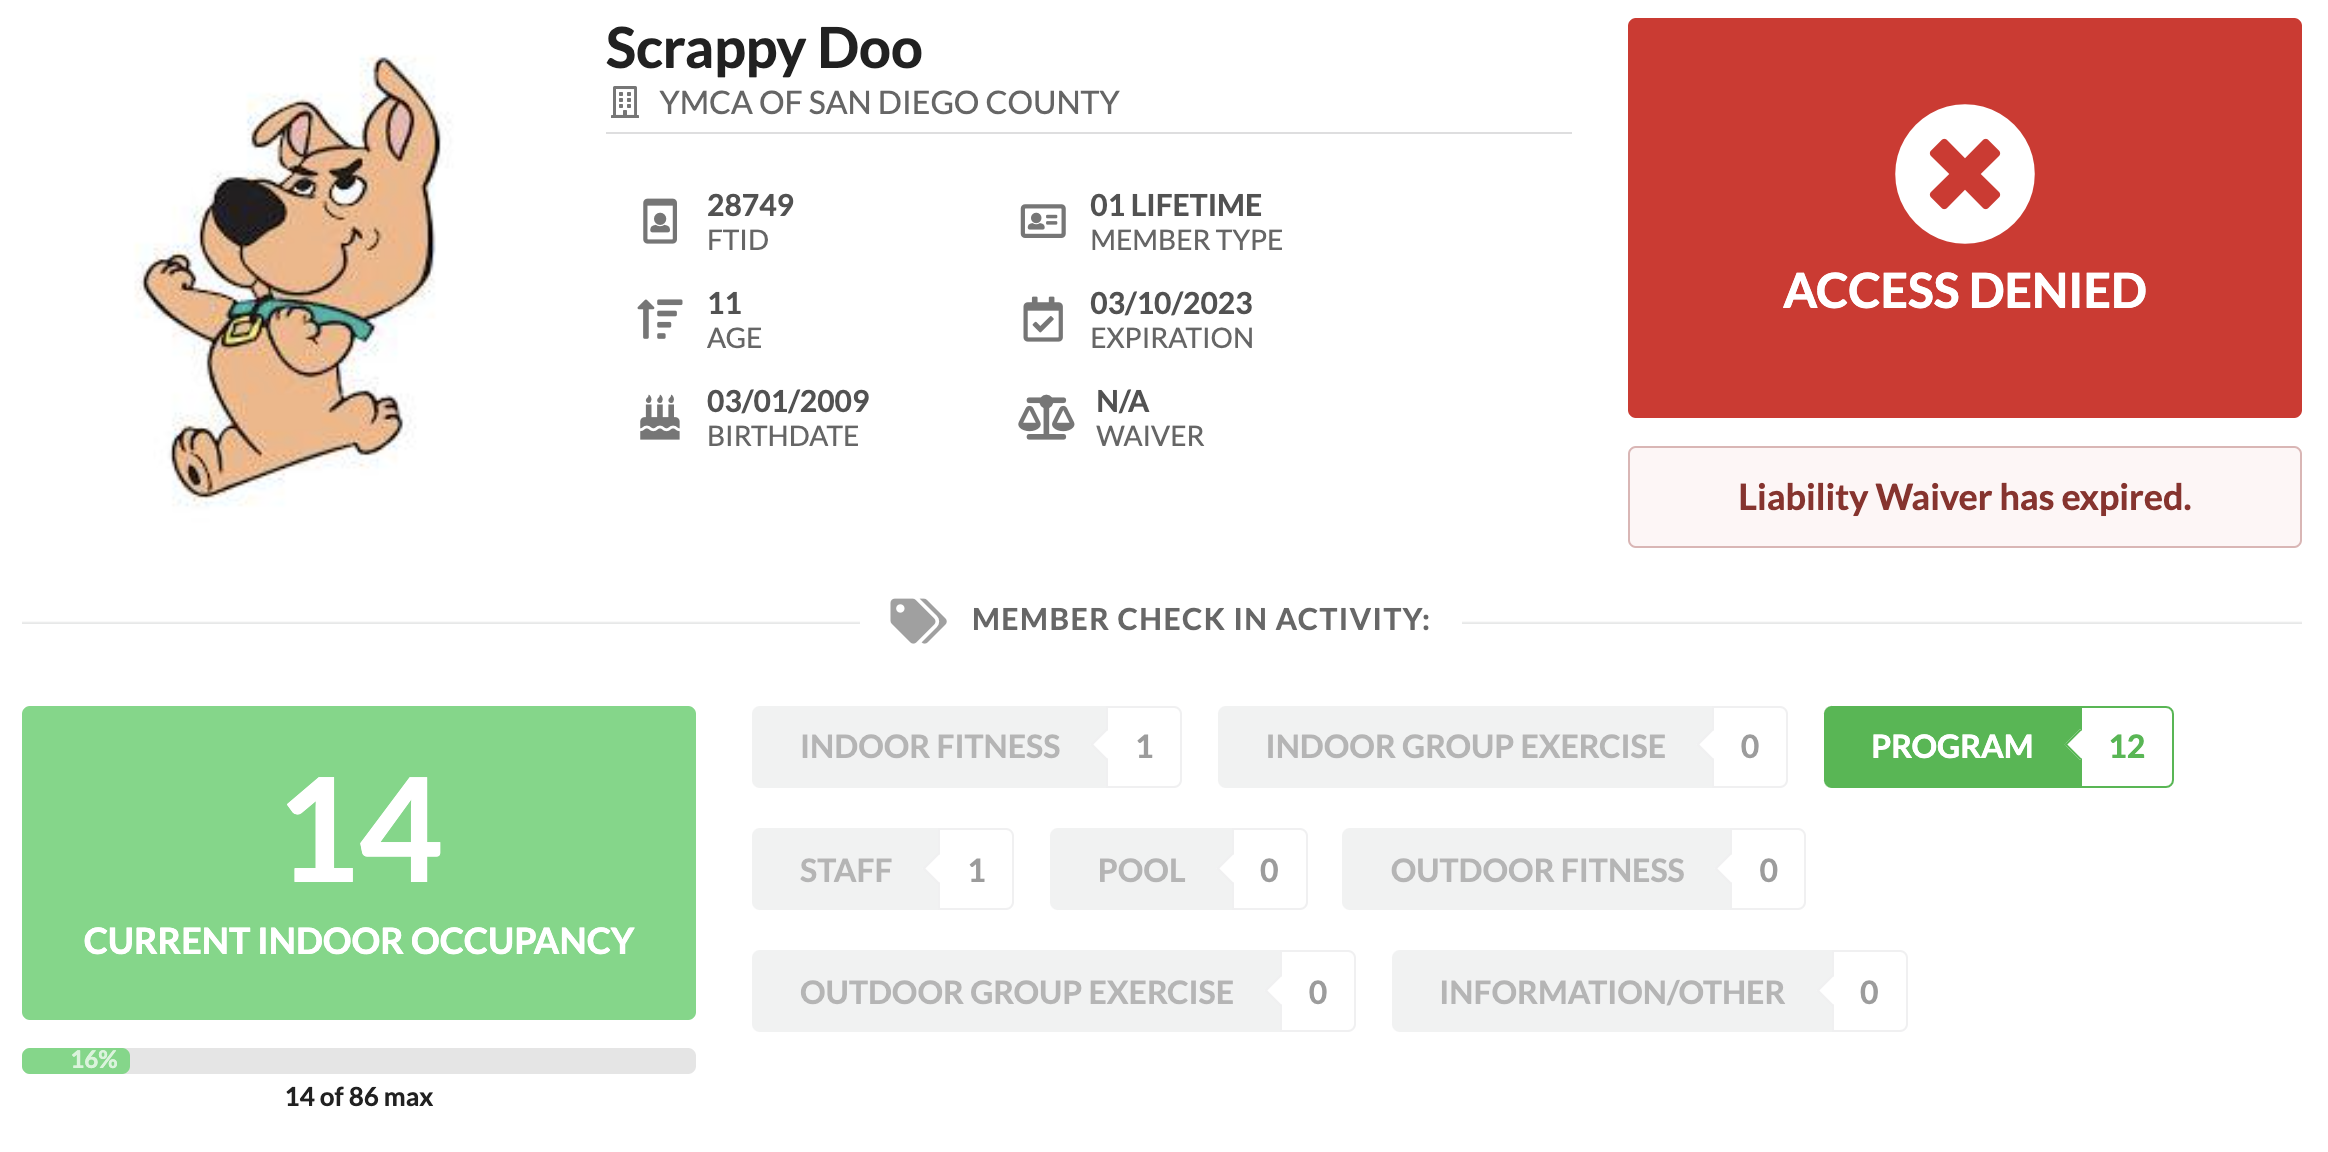
Depending on the situation, the member should be directed either tp member services to resolve a membership issue or to complete their waiver via waiver self service portal or the in branch waiver kiosk. After the issue is resolved, the member should be asked to scan back in to record a valid gate scan. - Program Participant Check In
To check in participants for indoor programs such as camp or AEP who will be included in indoor occupancy counts, no initial scan is needed, instead select PROGRAM as the check in activity to bring up a multi-member check in dialog.
Set the total number of participants entering the facility and click CHECK IN: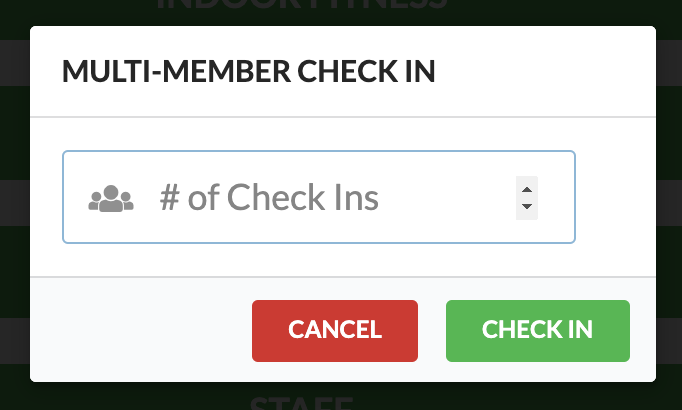
- Facility Check Out
As members scan themselves out at the check out station, they will be removed from the activity they last checked into. If this was an indoor activity, the indoor occupancy count will lower.
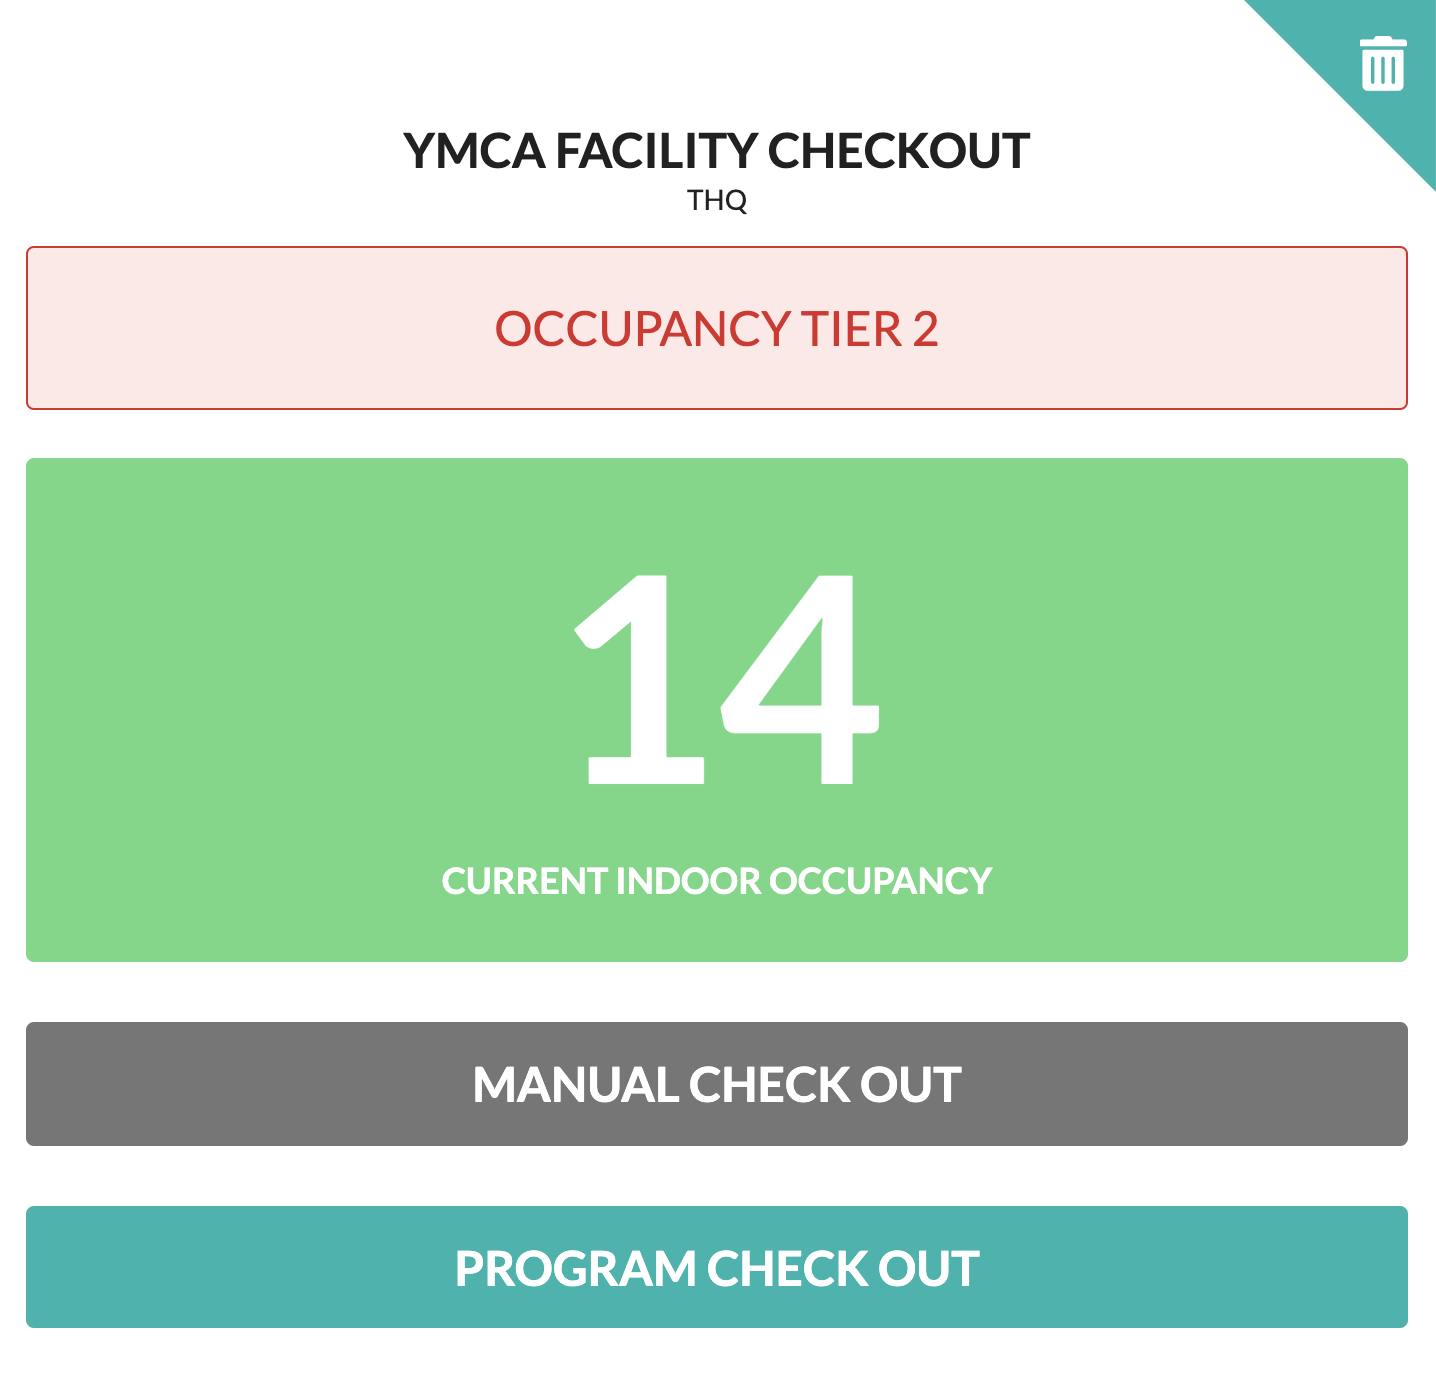
Manual Check Out
Manual check out may be used to adjust the indoor count members have left without scanning. Please note that doing so will not decrement individual activity counts, only the overall indoor occupancy count. - Program Check Out
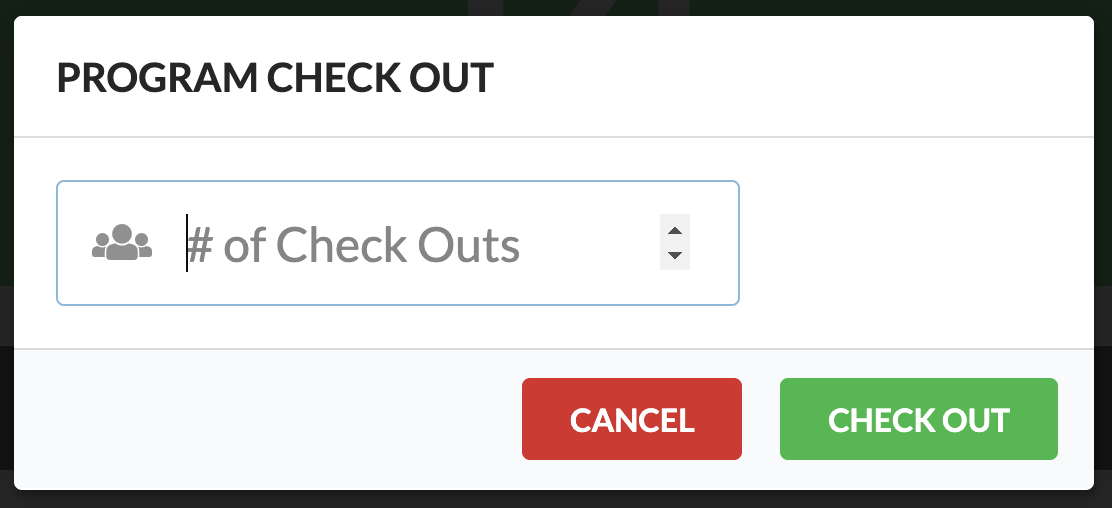
To check out indoor program participants, clicking on the PROGRAM CHECK OUT button at the check out station will bring up the program check out dialog.
Enter the number of program participants leaving and click CHECK OUT. These will be decremented from both the Program activity counter as well as the overall indoor occupancy count.