
Y Member Onboard supports branch staff with prospect intake, household setup, membership sales, scholarship applications, waivers, orientation scheduling, translation support, and related tablet workflows. This guide organizes the core tasks in the order staff most commonly use them.
Use this article to support day-to-day branch operations in Y Member Onboard. Follow local branch procedures whenever a supervisor or department-specific workflow requires additional review.
Staff Quick Reference
- Use one tablet per staff member per shift whenever possible.
- Log in with your own Salesforce and Upace credentials only.
- Log out of both systems before handing the tablet to another staff member.
- Scan the primary contact first, then confirm the correct name appears in the scan bubble.
- Add all household members before starting a membership sale or scholarship workflow.
- Review red indicators carefully before moving forward with a tour or engagement.
- Use the built-in translator and waiver tools when they help remove barriers to service.
Setup
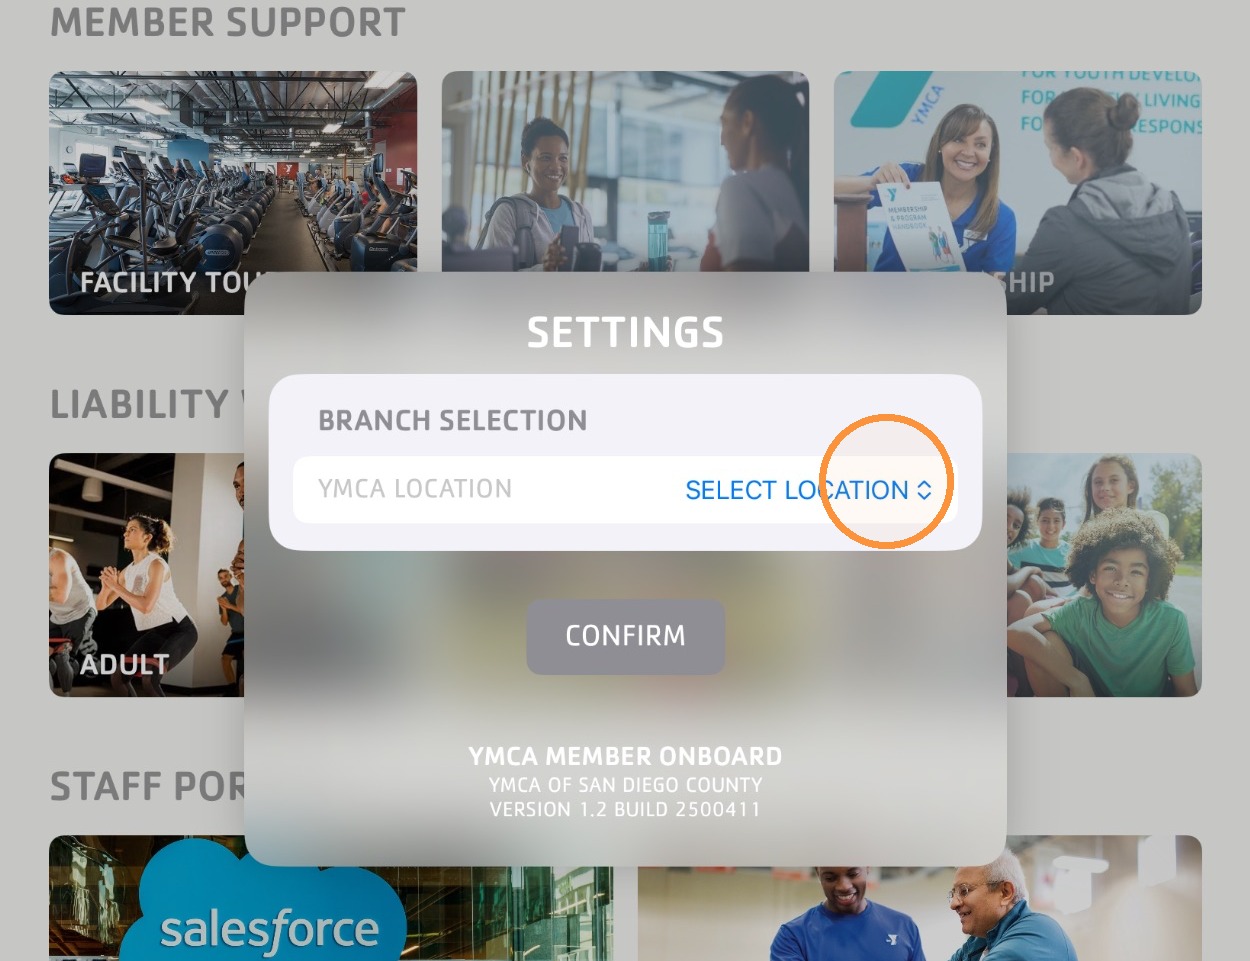
- Open the side navigation panel from the arrow button in the upper-left corner.
- Select Settings.
- Choose the correct branch location and tap Confirm.
Confirm the branch location before beginning staff log-in or member-facing workflows so transactions and forms route correctly.
Staff Log In
- At the start of the shift, tap Front Desk Operations.
- Log in to Salesforce with your YMCA account.
- Return to the home screen and tap Orientation Scheduling.
- Log in to Upace using the branch account.
Tour Capture
- Ask the prospective member for their ID or driver’s license and tap Scan.
- Scan the barcode on the back of the ID. The scan captures automatically when the barcode is recognized.
- If needed, switch the scanner mode to YMCA Member Card ID or Salesforce Record QR using the scan-mode toggle.
- Confirm the correct name appears in the scan bubble at the bottom of the screen.
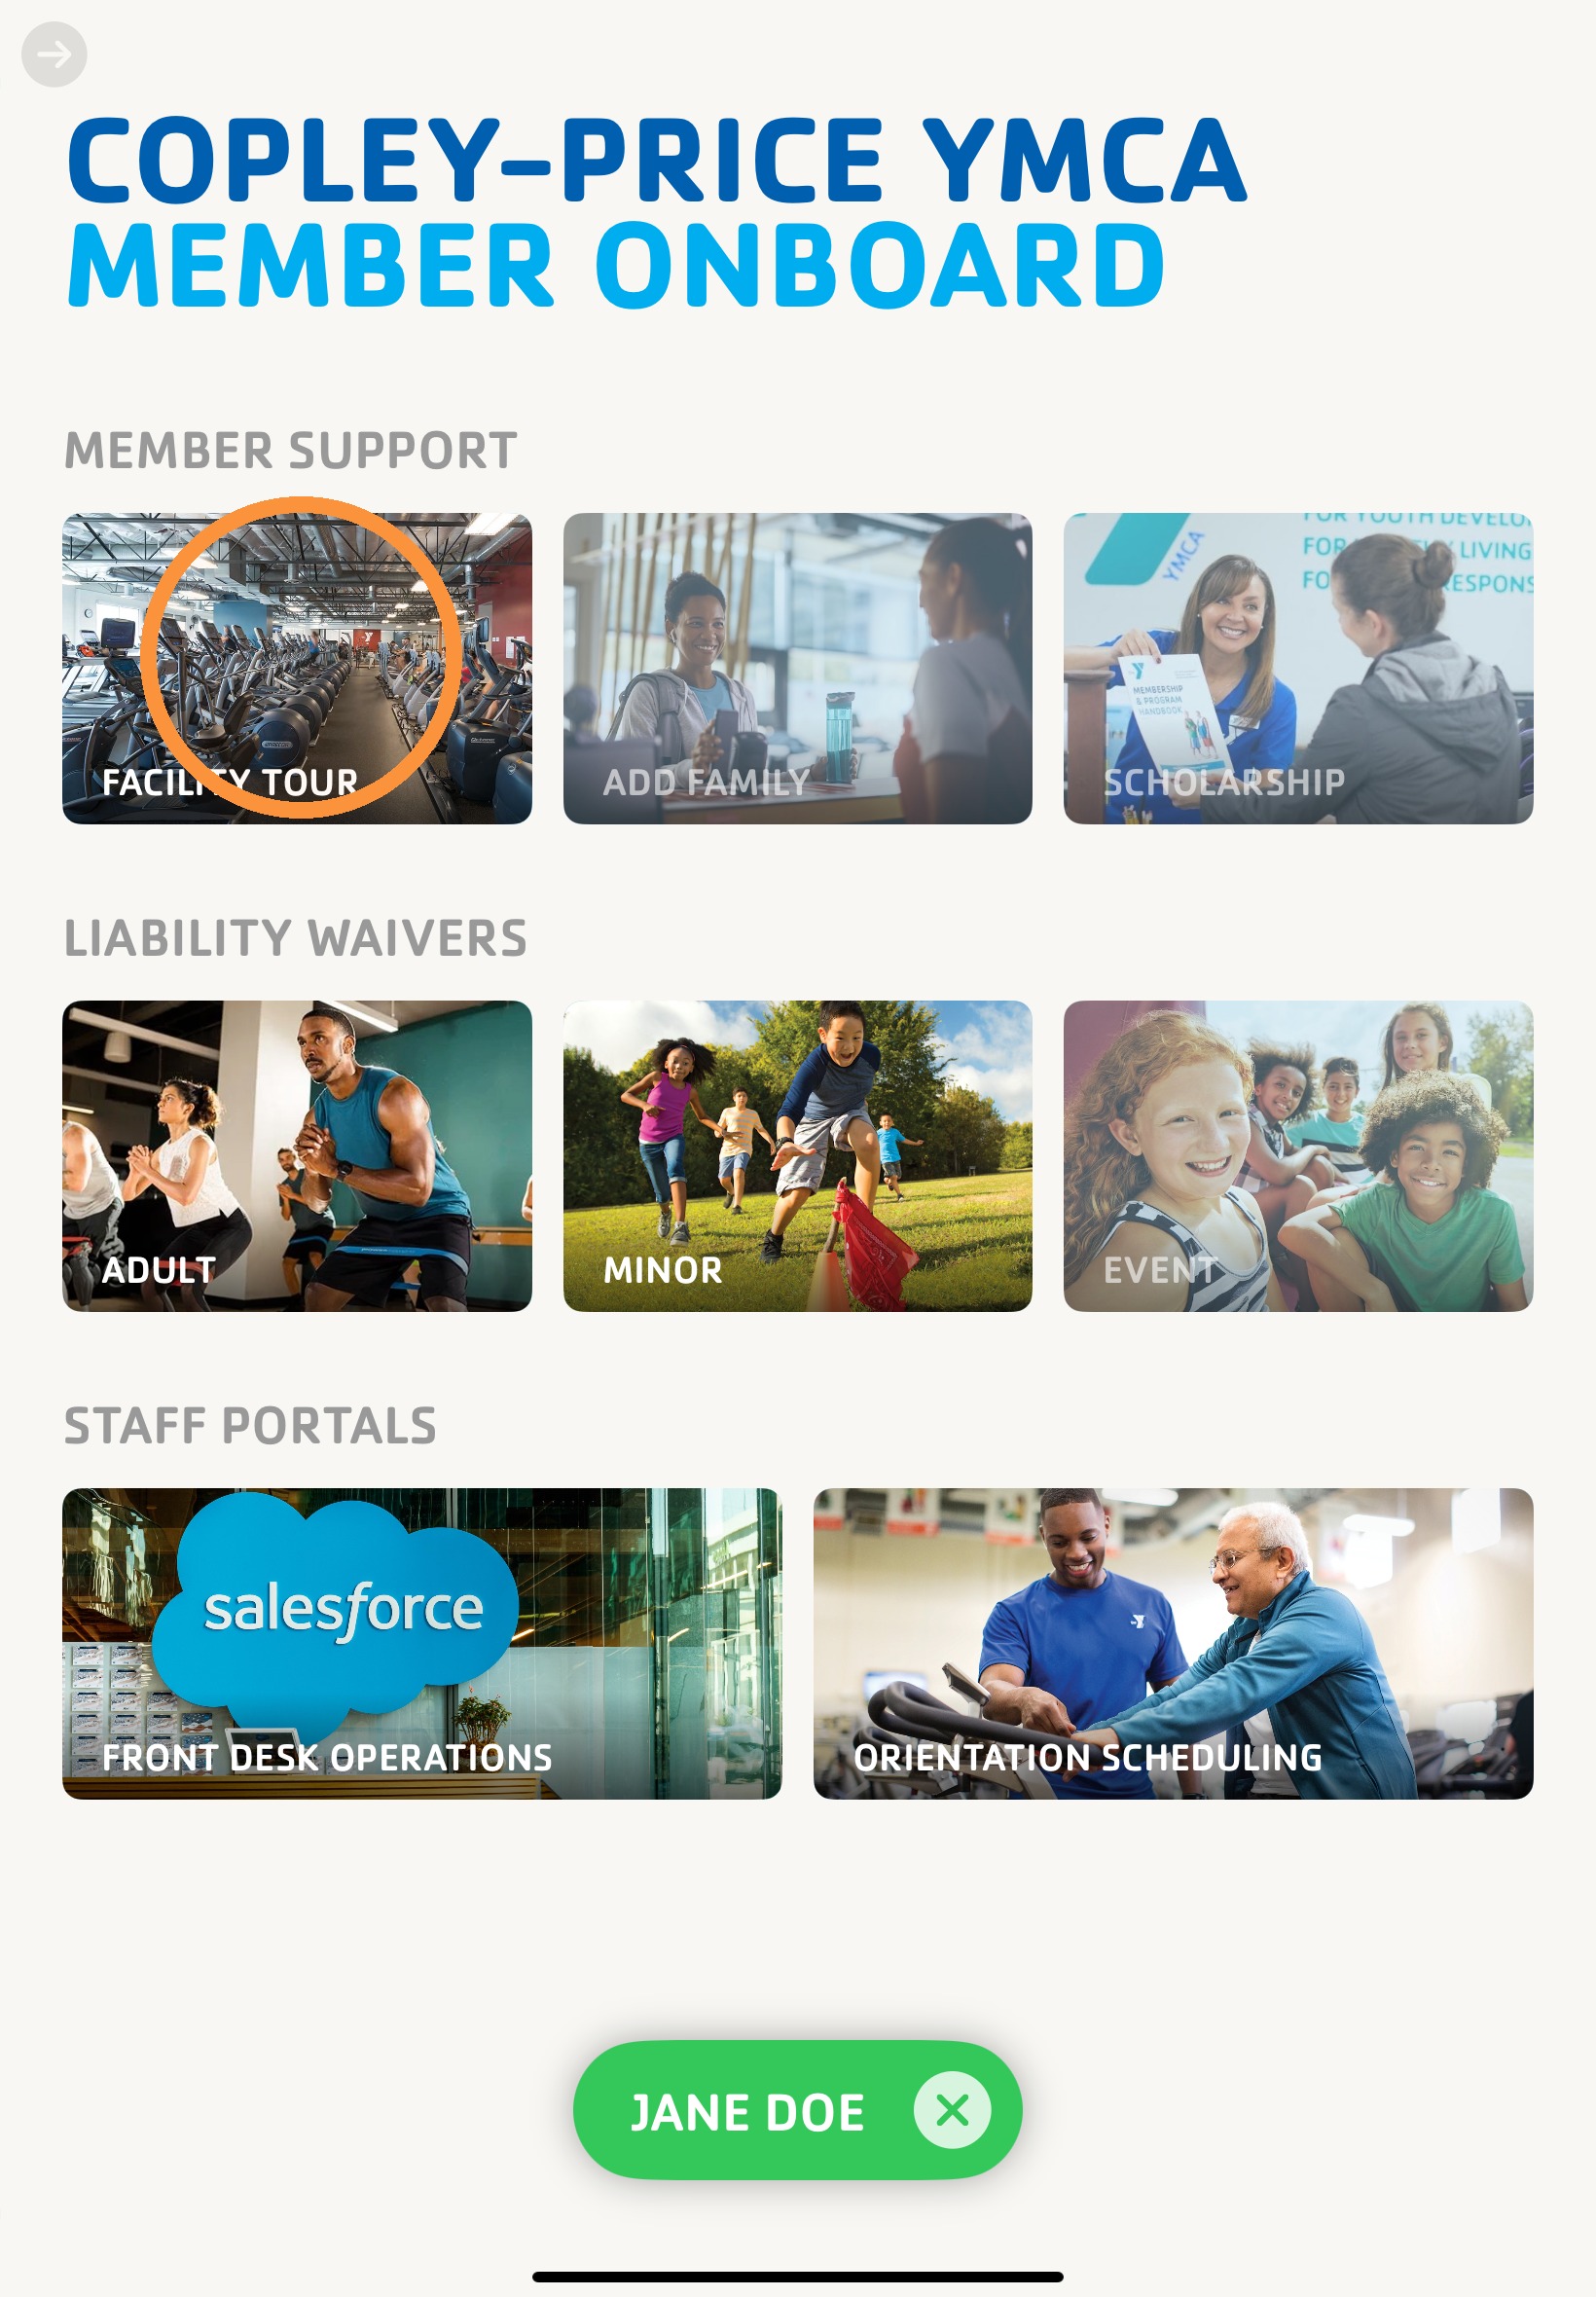
- Tap Facility Tour to open the intake form.
- Change the form language if needed, then have the individual review and complete the form.
- Confirm any Partner Affiliation and the correct Tour Staff Name before submission.
- Submit the form to create or update the Salesforce contact and open the Tour Card.
Scanned information prepopulates the intake form, which helps reduce manual entry and improves record accuracy.
Facility Block Alerts
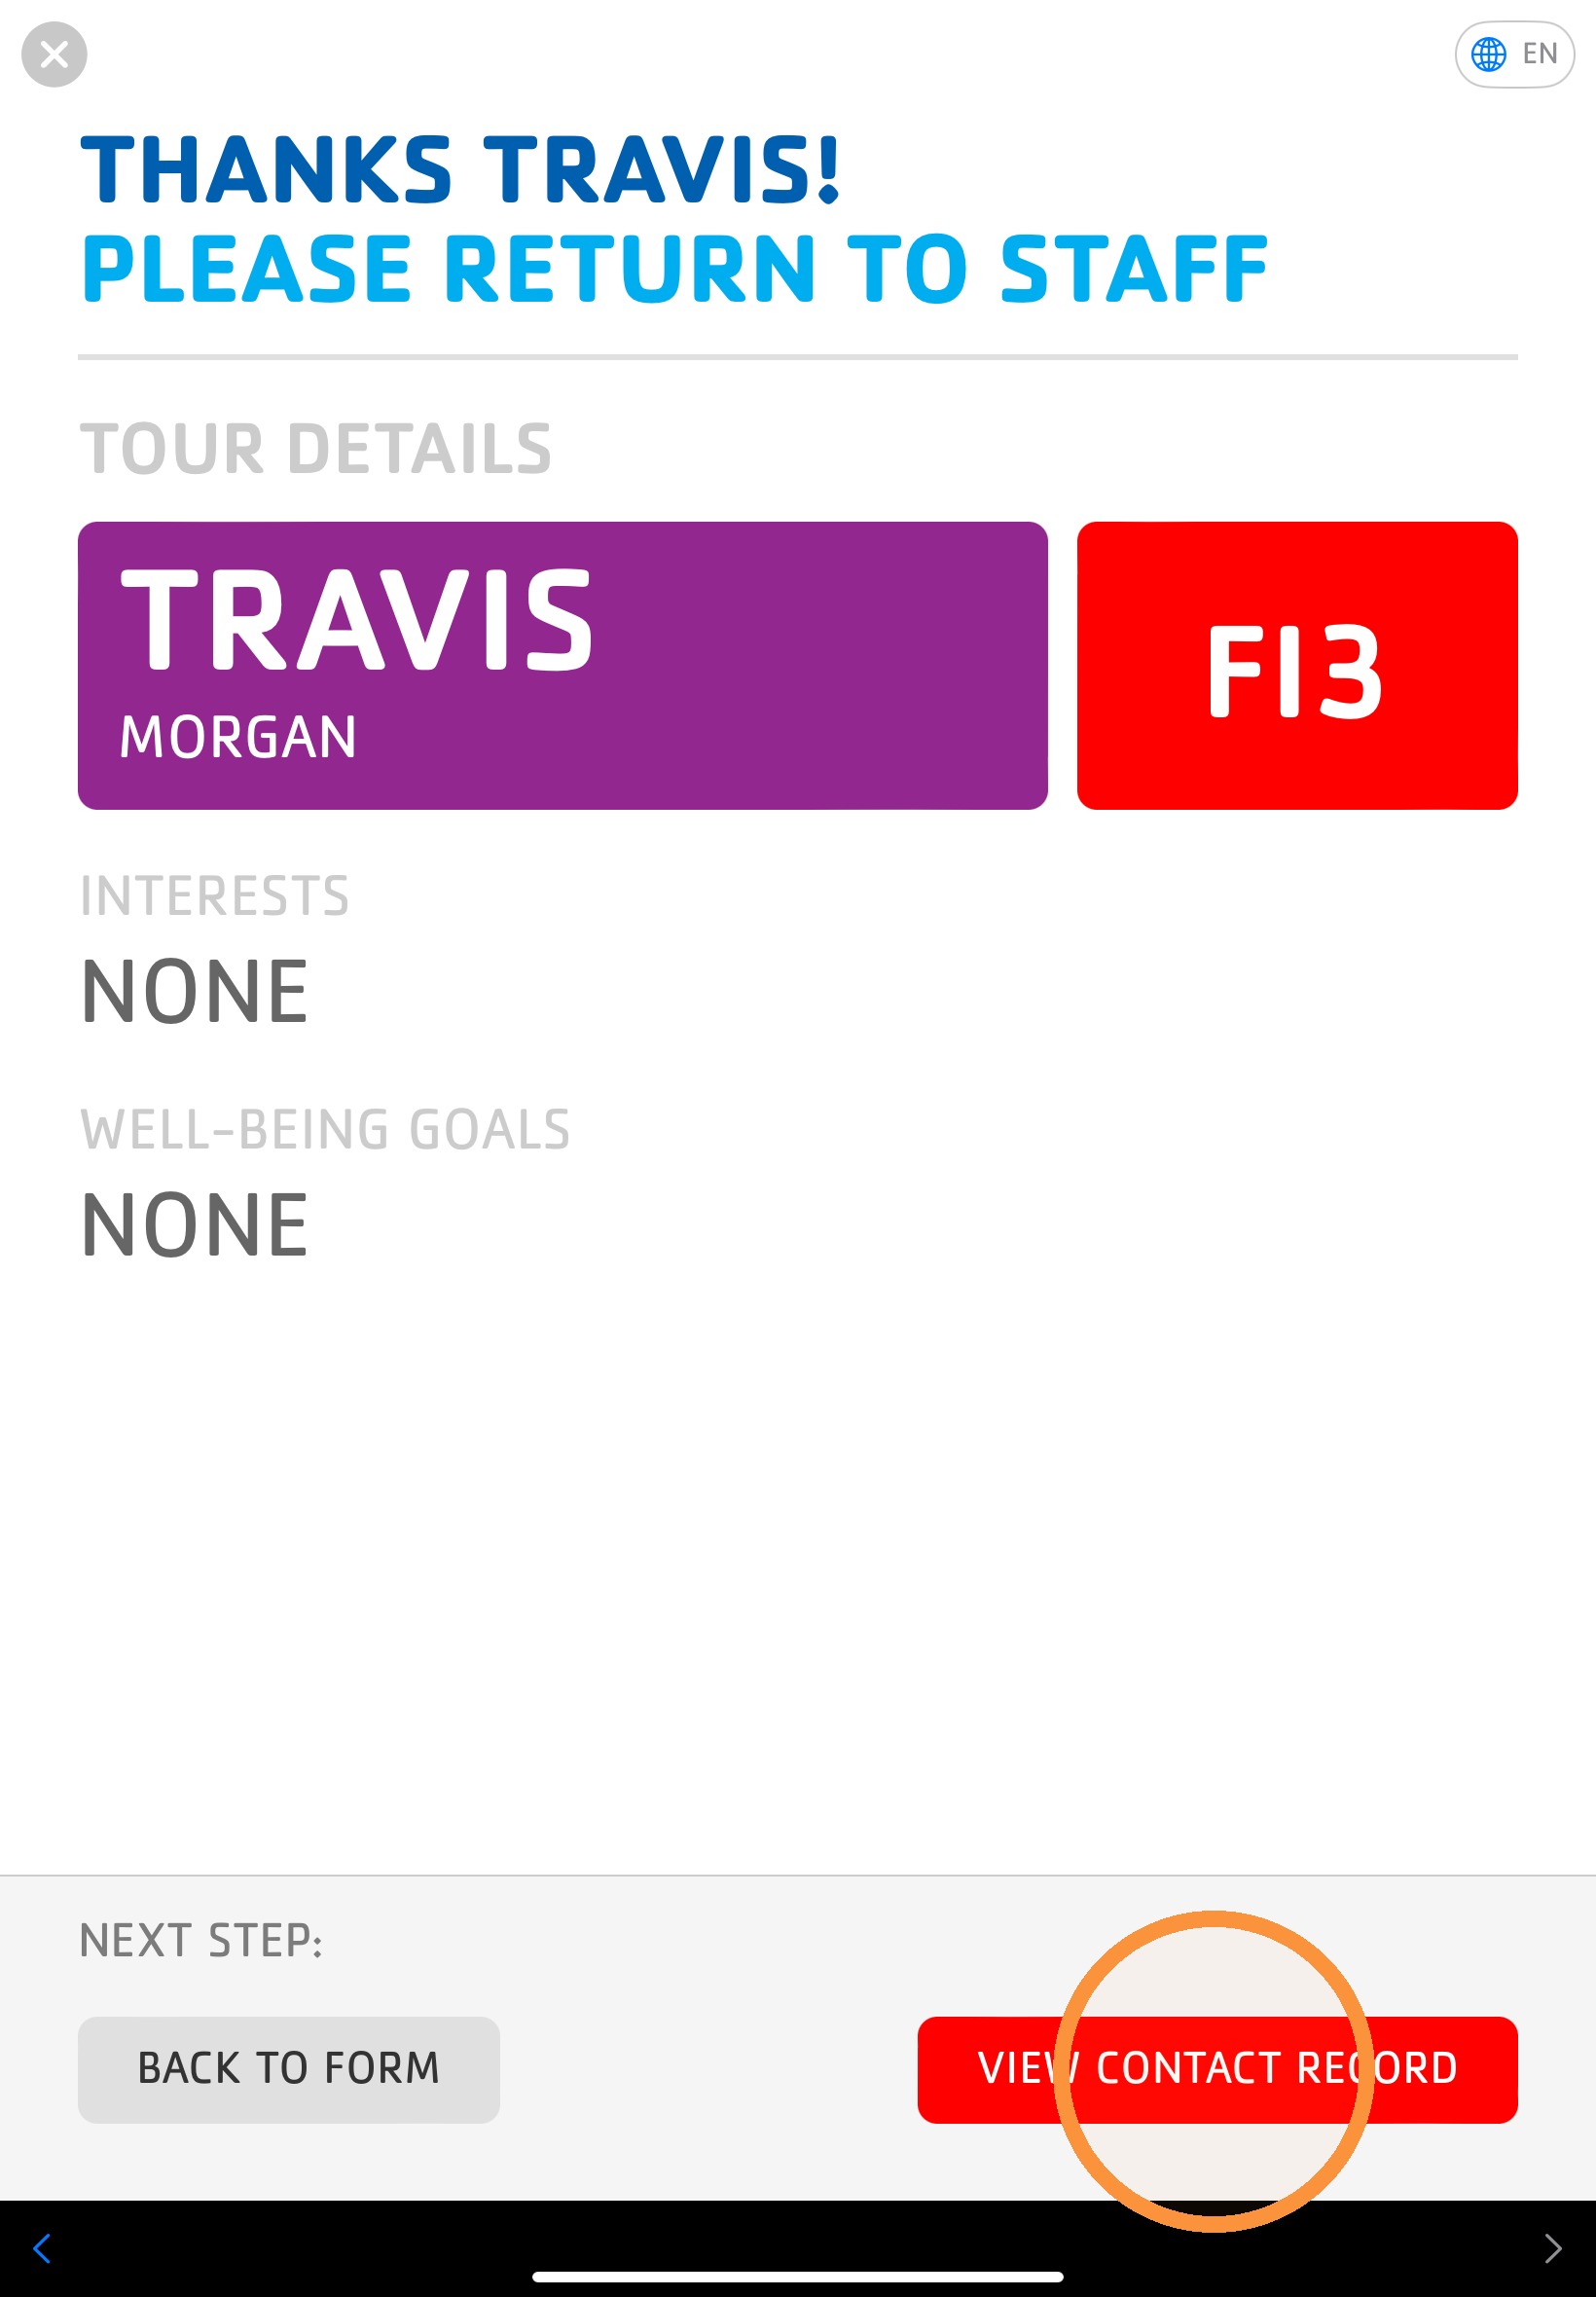
Red indicators on the Tour Card signal that the person may have a block reason or screening concern on their record.
- If the Tour Card displays red on the Age Code or View Contact Record button, stop and review the record before proceeding.
- Tap View Contact Record to review the details.
- Manage the interaction according to branch guidance and any documented block reason.
Adding Household Members
- After the tour, return to the home screen and confirm the primary contact is selected.
- Tap Add Family.
- Complete the additional household member form, which prepopulates the last name and address.
- Use Add Another Household Member until everyone in the household has been added.
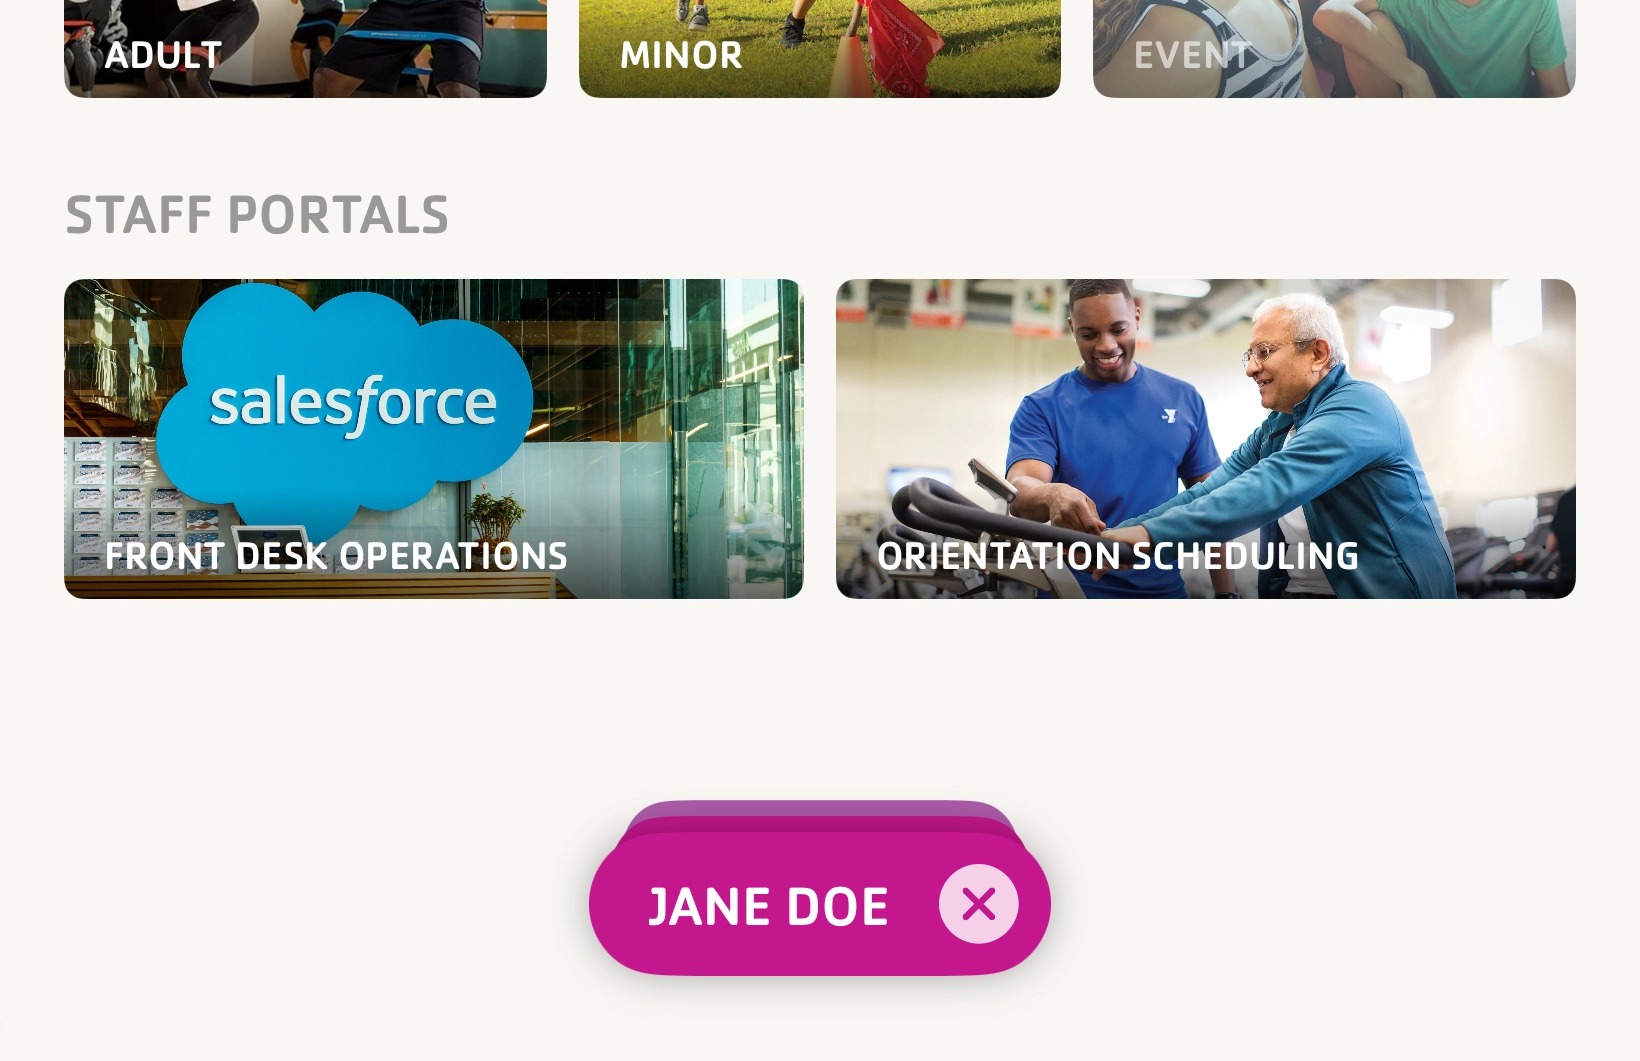
- Close the form and confirm the stacked name bubbles appear on the home screen.
- Tap the household stack whenever you need to switch between members.
Complete household setup before membership, scholarship, or other family-based transactions so downstream workflows reflect the correct household structure.
Membership Sale
- With the primary contact selected, tap Front Desk Operations.
- Proceed through the membership sale workflow.
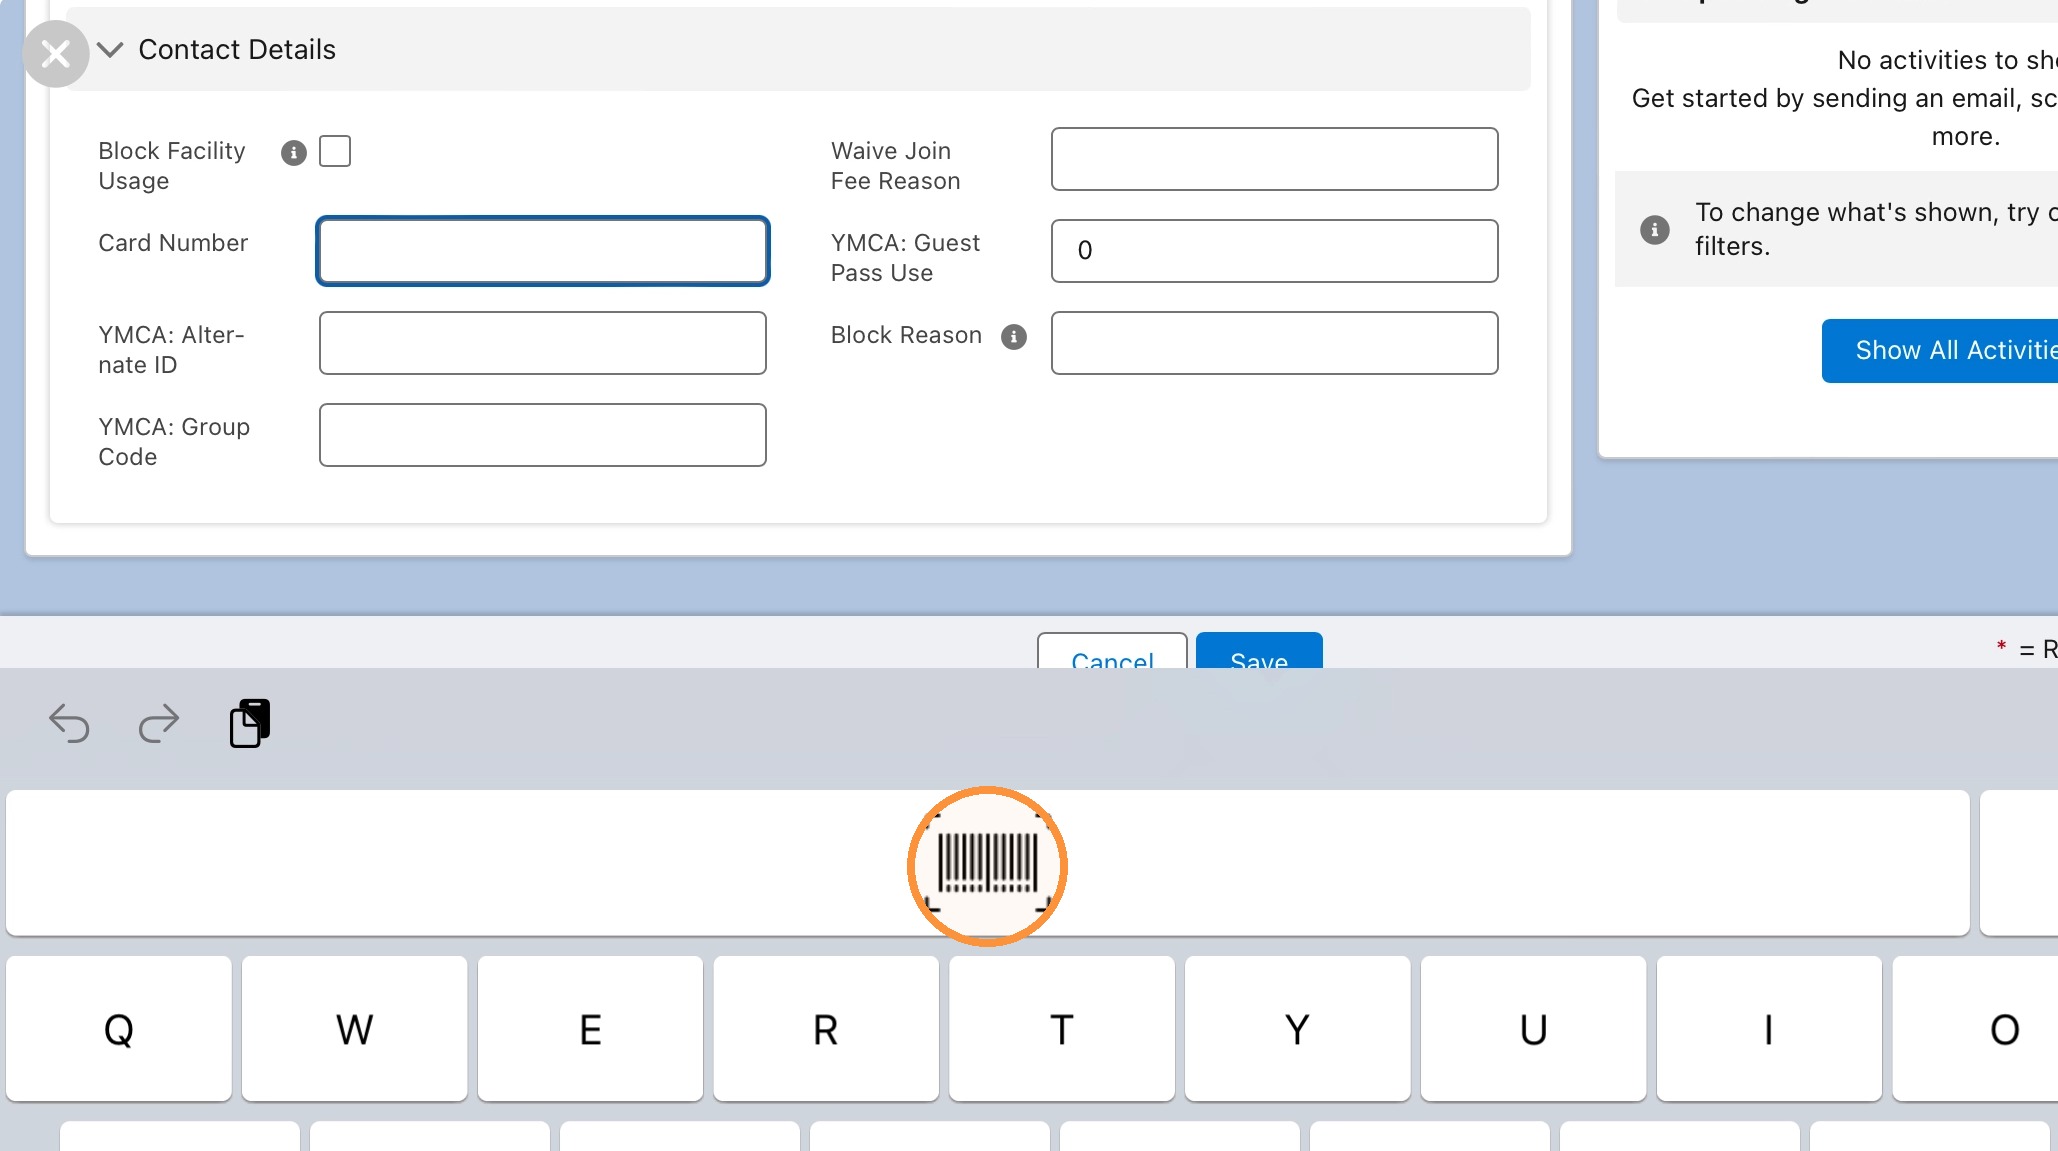
- If assigning a physical key tag, edit the Card Number field and use the keyboard scan button.
- Scan the barcode on the key tag and confirm the card number populates correctly.
- Once the sale is complete, tap Upace Sync so orientation scheduling can proceed correctly.
Orientation Scheduling
- Tap Orientation Scheduling.
- Select the correct Reservation Type and Orientation.
- Search for the member name and save the reservation.
Orientation scheduling depends on the member being properly created and synced, so complete membership sale steps first when applicable.
Point of Sale Transactions
- From the contact record, tap POS – Tablet.
- Select the correct branch terminal and tap Next.
- Proceed with the transaction and checkout steps.
Scholarships
When a contact is already selected, scholarship forms prepopulate contact information so staff only need to complete the scholarship-specific questions and upload documents when available.
- Select the contact and open the Scholarship workflow.
- Complete the scholarship-specific questions.
- Upload documentation by taking a photo when the applicant has documents available.
- If documents are not available, submit the application so it can continue through the standard scholarship review process.
Waivers
- Tap the Adult or Minor waiver button to begin.
- If a contact is already scanned and selected, the waiver attaches to that contact record.
- If no contact is selected, the waiver remains a standalone Smartwaiver entry.
Translator
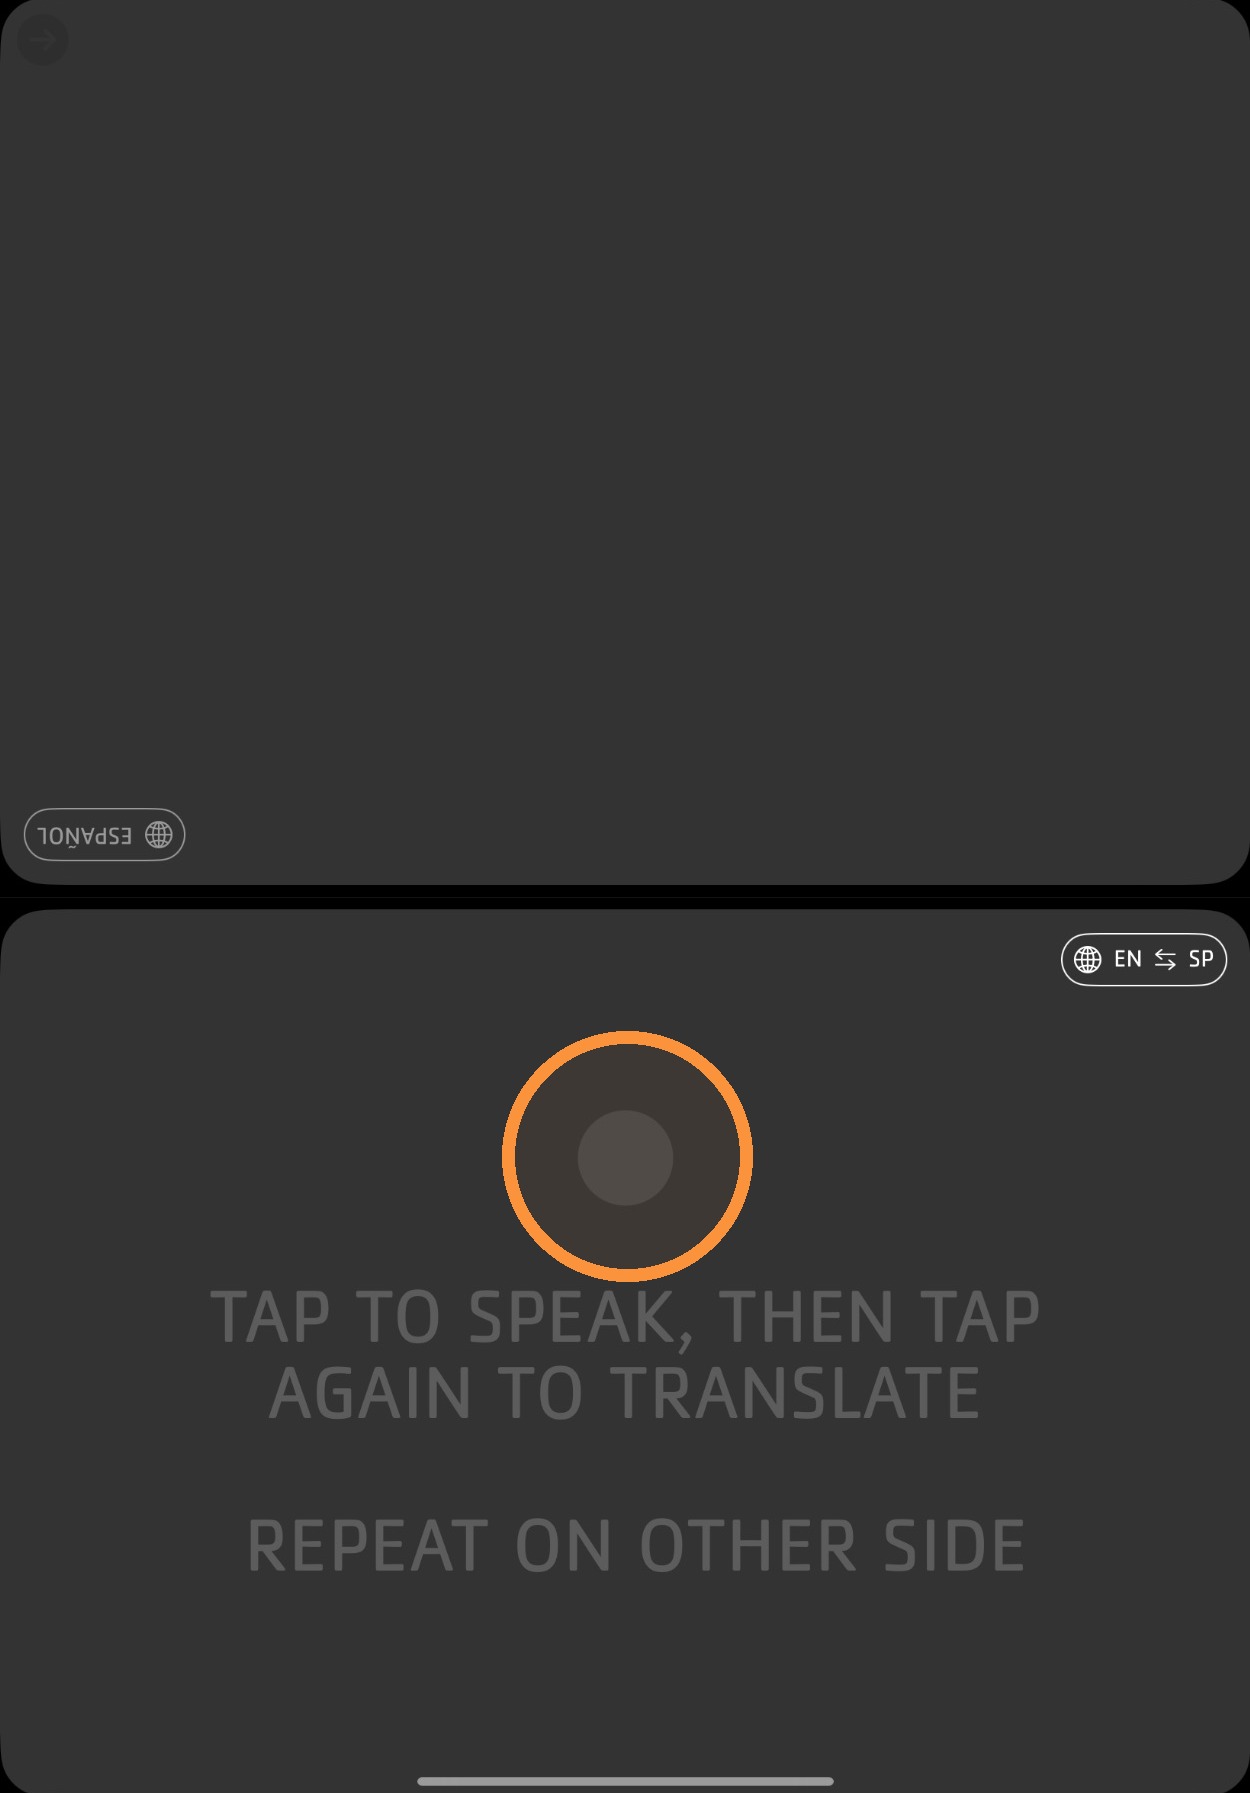
- Open the side navigation panel and tap Translator.
- Use the language selector to choose the target language before starting.
- Hold the tablet between the staff member and the participant.
- Tap the half of the screen closest to the current speaker to begin listening.
- Tap again when the speaker is finished so the translation can be spoken and displayed on the opposite side.
- Repeat by tapping the opposite half of the screen for the next speaker.
Staff Log Out
- Before ending the shift or handing off the tablet, open Front Desk Operations and log out of Salesforce.
- Return to Orientation Scheduling and log out of Upace.
- Confirm both systems are fully signed out before returning the tablet or passing it to another staff member.
Frequently Asked Questions
What does the scan bubble color mean?
A green bubble generally means the scanned person does not currently match an existing Salesforce record. A purple bubble indicates the person matches an existing contact record.
When should staff add household members?
Add household members before membership sales, scholarships, or other workflows that depend on accurate household structure.
Can a scholarship application be submitted without documents?
Yes. If documents are not available during intake, staff can still submit the application and the Business Center will request supporting documents during review.
Why is Upace Sync important after a membership sale?
Upace Sync helps make sure the new member record is available for orientation scheduling and related follow-up workflows.