
-
Sign in to your YMCA email by going to https://outlook.office365.com.
-
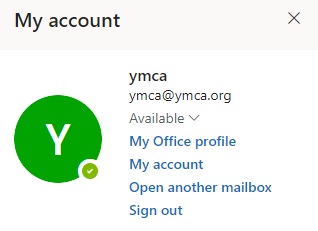
From office 365, click on the silhouette in the top right-hand corner.

-
From the Office 365 menu, select “Open another mailbox”.
-
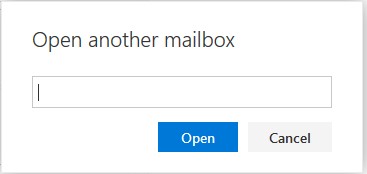
In the “Open another mailbox” dialog box, enter the email address of the shared mailbox.
-
Once the shared mailbox name appears in the box, click “Open” and the shared mailbox will open in your browser.

- Adding the Shared Mailbox to displays under your primary mailbox in Outlook Web App
Sign-in to your mailbox by going to https://outlook.office.com.
Right click on “Folders” on the left navigation pane above your inbox, and select “Add shared folder”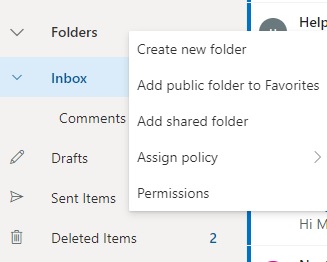
-
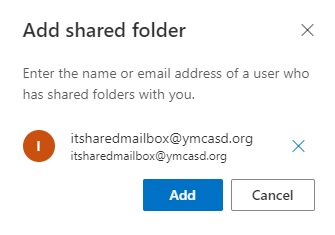
In the Add shared folder dialog box, type the email address of the shared mailbox and click Add.
-
The shared mailbox will show in our Folder list. To remove the mailbox from the Folder list, right-click on the shared mailbox and select “Remove shared folder”.
- Sending an email from the Shared Mailbox
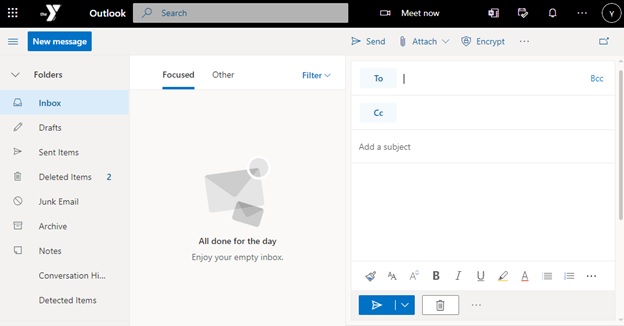
Click on “New message” above your folder list. A new message form will open in the reading pane.
-
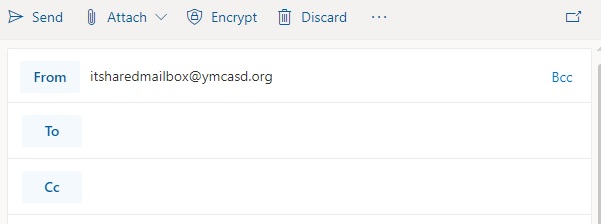
Click on the More options ” …” and select “Show From”

-
Click on “From” and change your email address to the shared mailbox. This will show the recipient that the email comes from the shared mailbox and not from your email account.
-
Compose your message and click on “Send”.