
Windows Virtual Desktop is a remote workspace platform which gives a full desktop experience, connected to all YMCA network resources delivered through a web browser or desktop client.
An active YMCA account with approved access via Helpdesk is needed to access Windows Virtual Desktop.
If you don’t know your account details or need help recovering your password, click here for details on how to recover it.
USING WINDOWS VIRTUAL DESKTOP FOR THE FIRST TIME
- Request Access
There are a number of setup steps required prior to enabling access to the platform. Submit a Helpdesk ticket to request access.
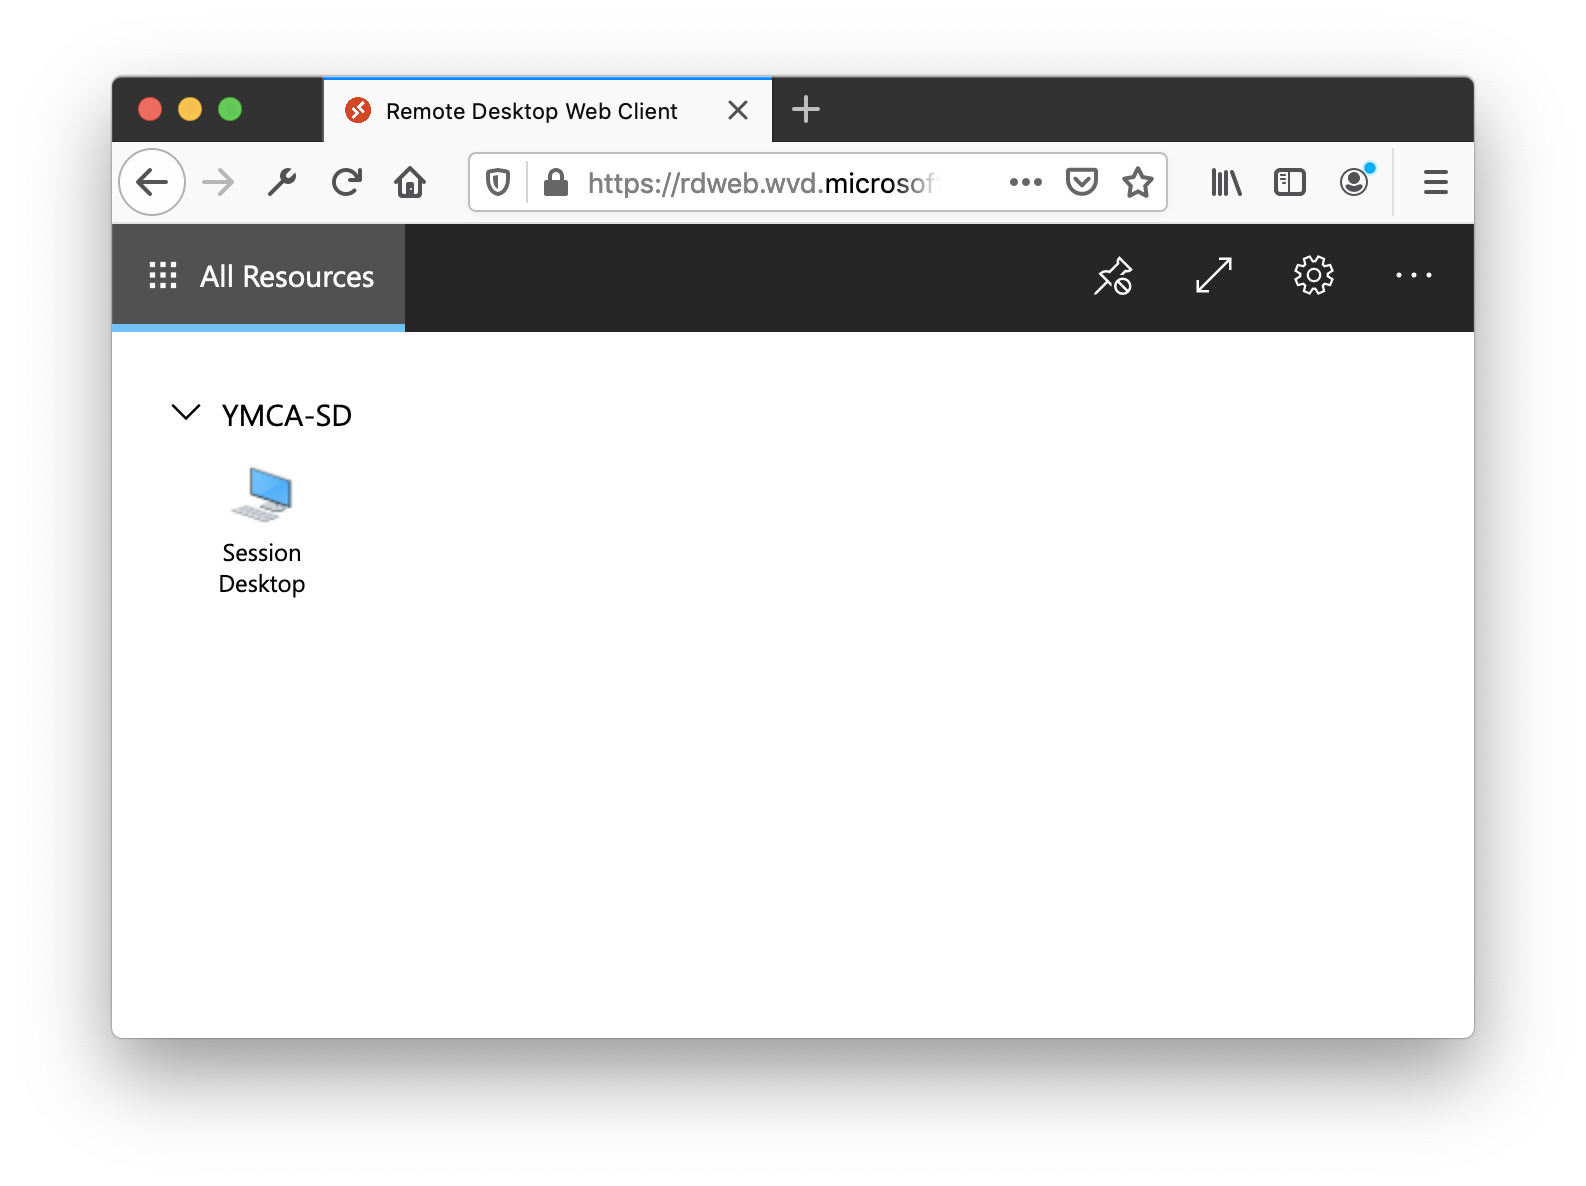
- Access the Portal
Once you have received confirmation that your account has been configured and ready for use, go to: https://rdweb.wvd.microsoft.com/arm/webclient and log in using your YMCA credentials to get to the WVD Resource Page:
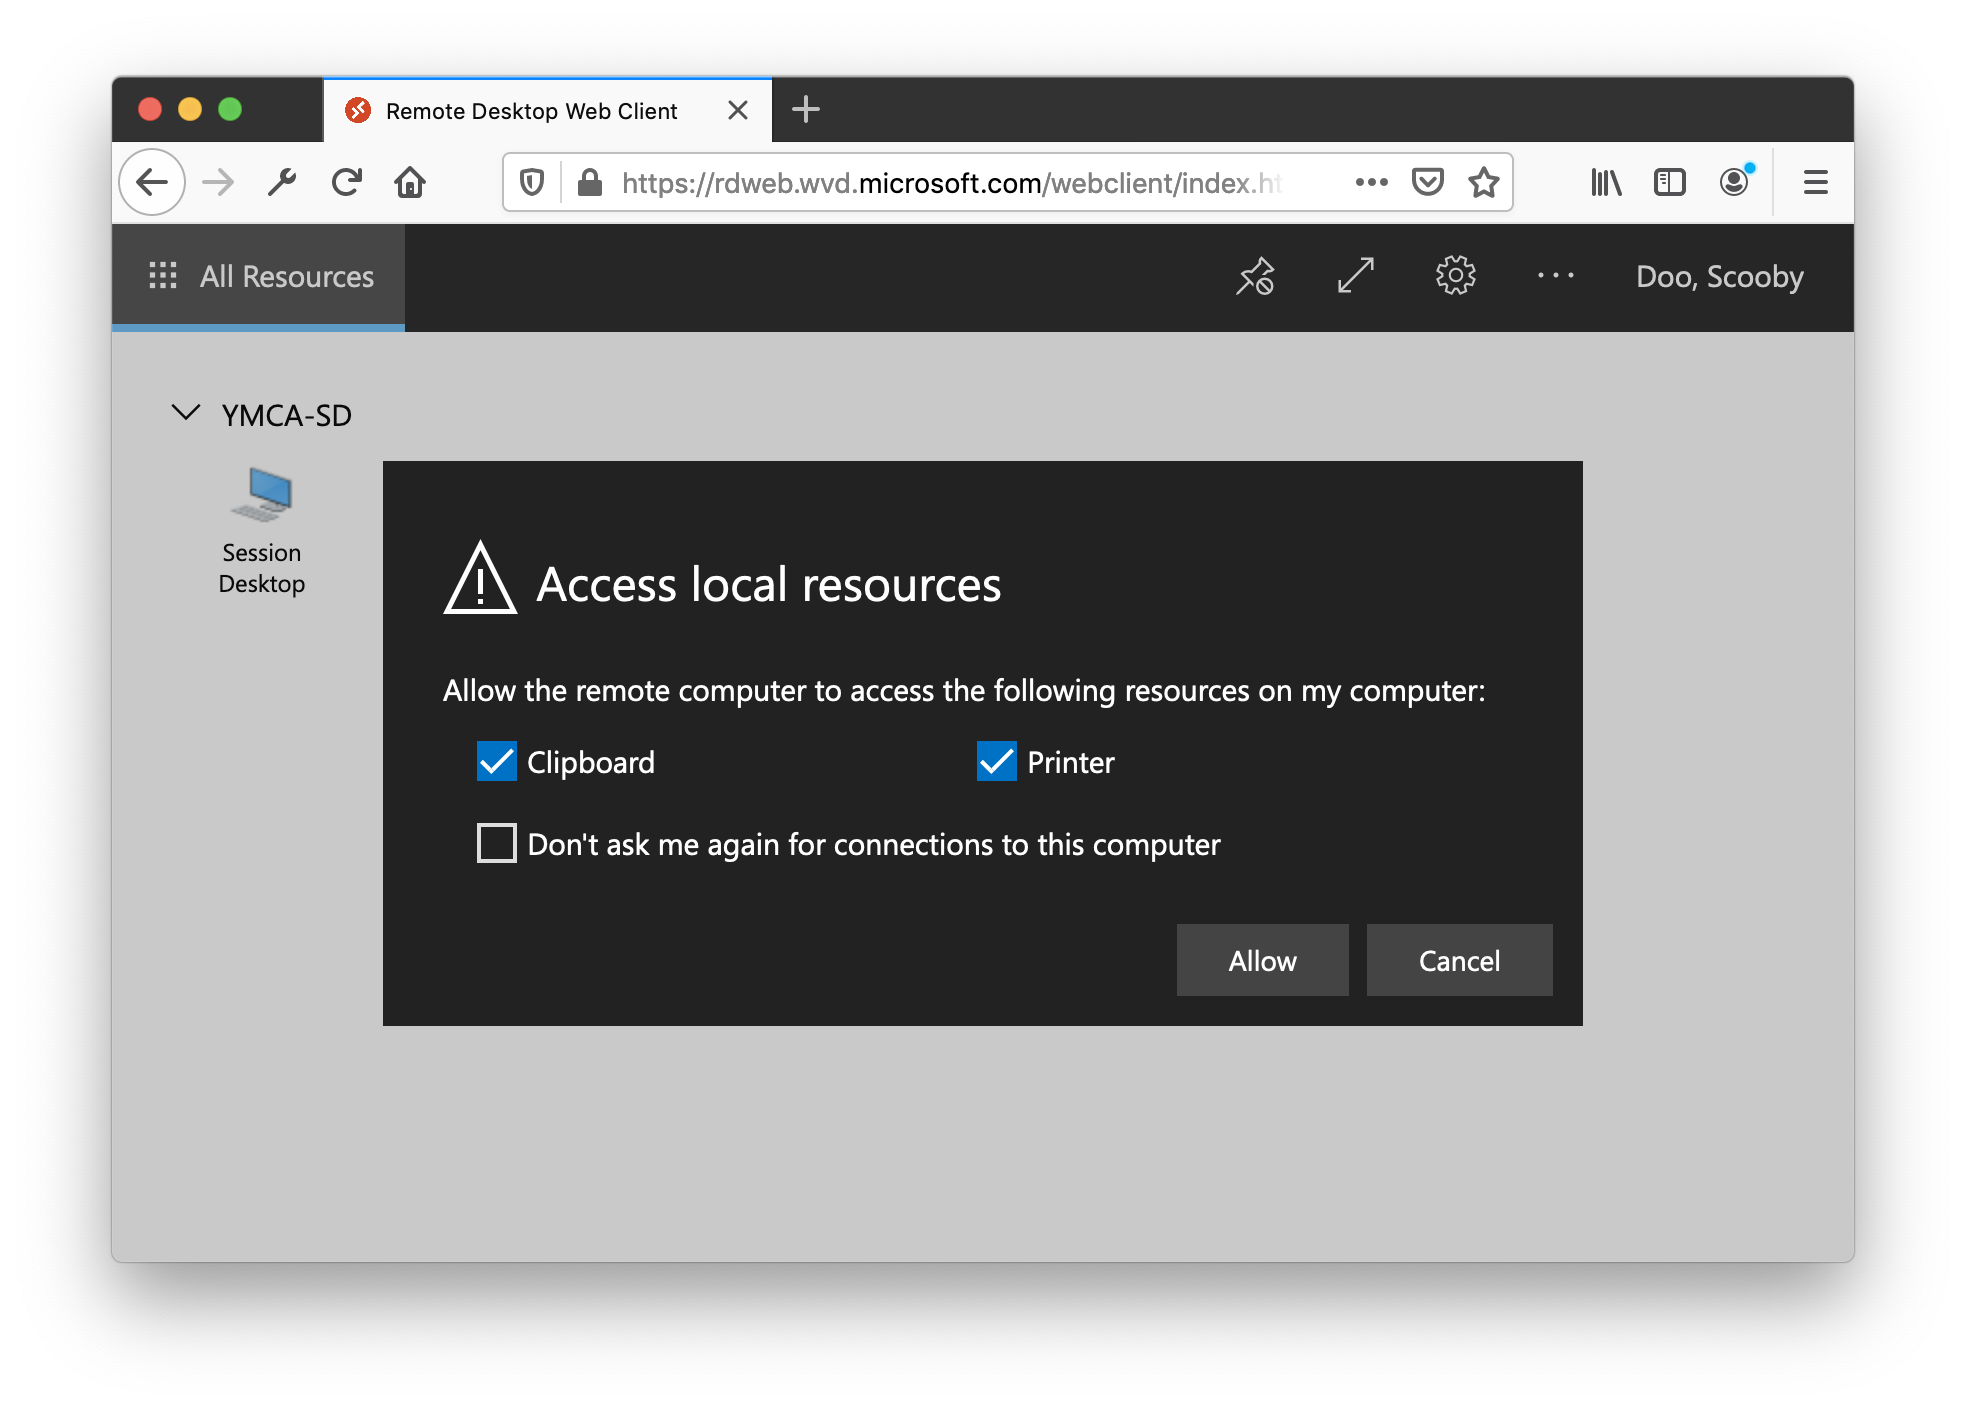
- Enable Local Resource Redirection
When prompted, click ALLOW to grant your session permission to local desktop resources:
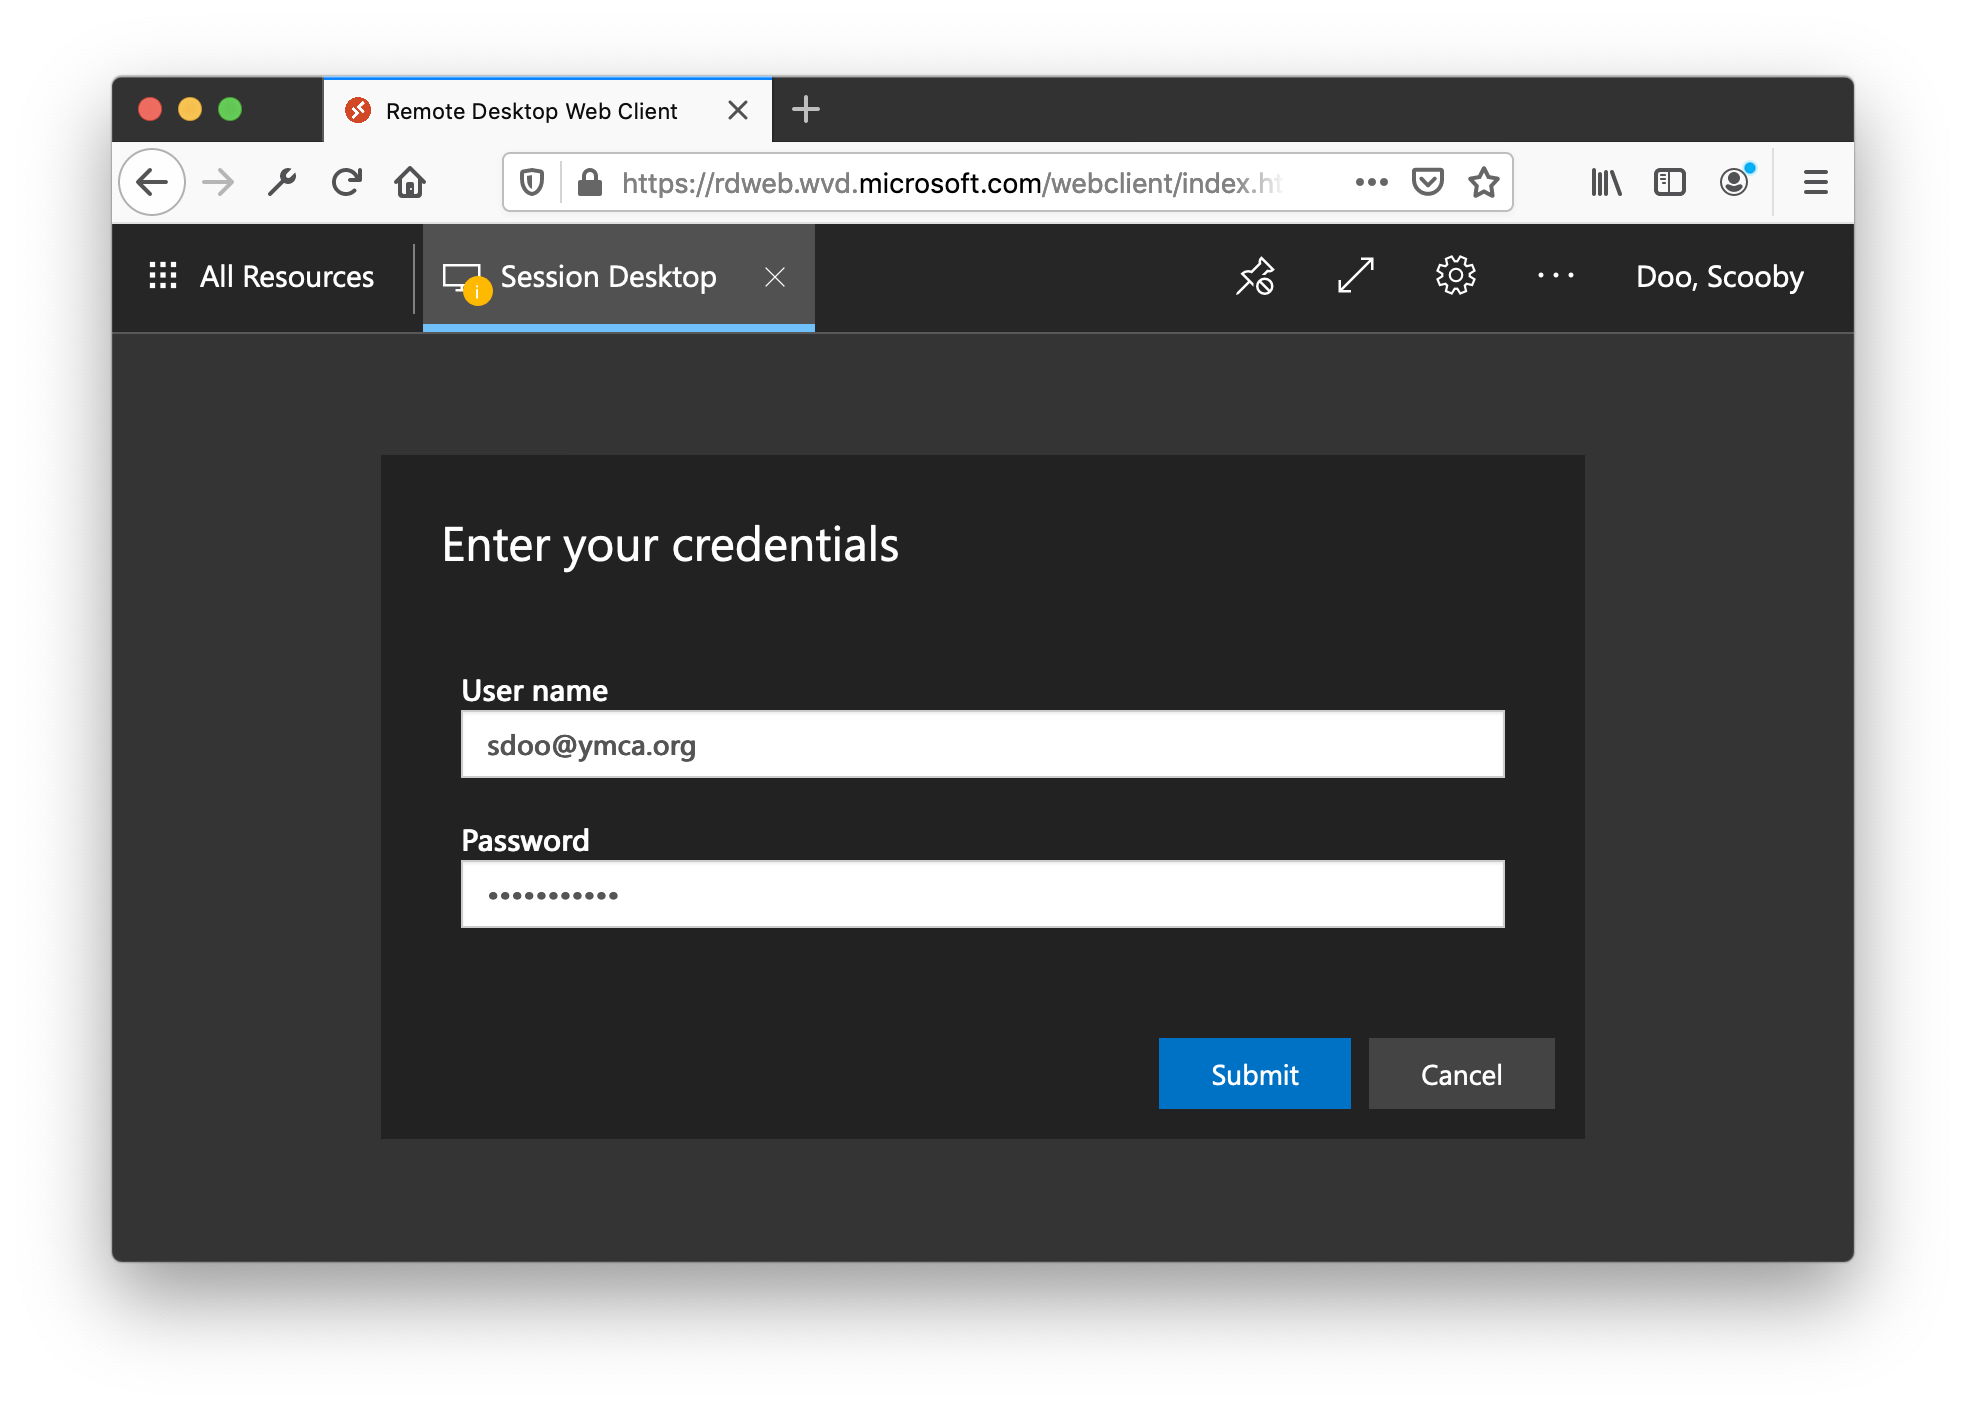
- Authenticate onto your Virtual Desktop
When prompted, log in with your FULL EMAIL and PASSWORD:
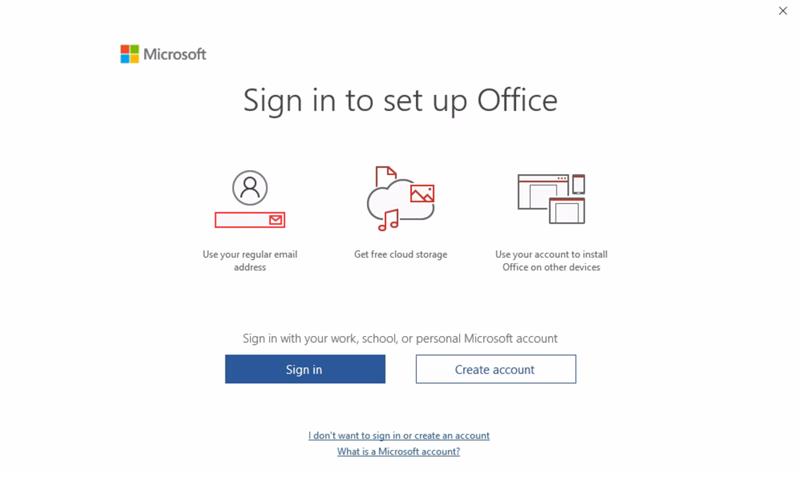
- Microsoft Applications
When running your Microsoft applications for the first time you will need to activate them by signing in with your full email:
- Launching YMCA Applications
Your new virtual desktop is hosted in the Azure cloud and is part of a domain called ‘CLOUDCORP‘.
BE AWARE: By default, when attempting to access most resources, your virtual desktop may try to use your CLOUDCORP account instead of your ymcasd.org or YSD one.
as you launch applications, please keep an eye out to make sure that you are logging on using the correct account and click SWITCH USER or OTHER USER if needed to switch accounts: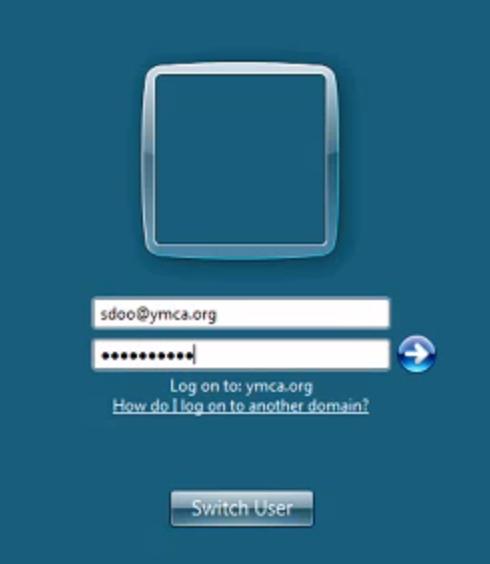
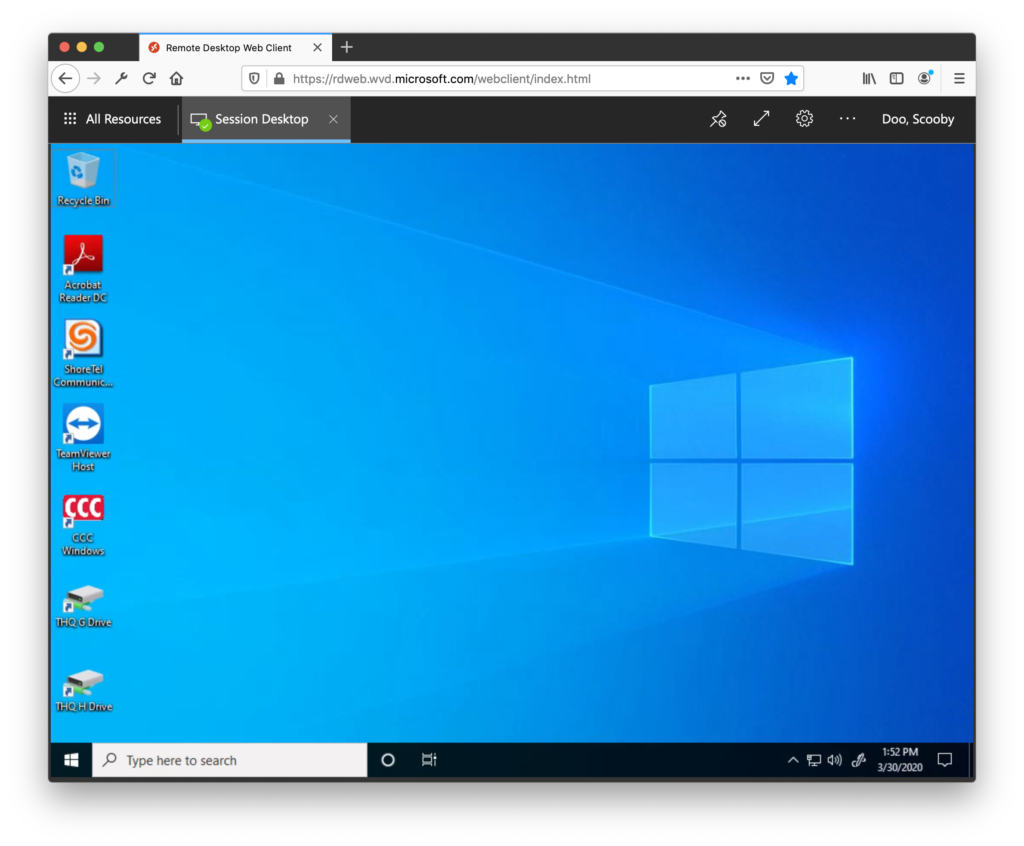
After taking these initial step you should be able to user the desktop as you would your work computer.
USING THE WVD REMOTE DESKTOP CLIENT
An alternate way of accessing your virtual desktop is by using the windows Remote Desktop Client which gives a more feature-reach and seamless experience, allowing for things like printer redirection, dual monitor among other features.
To start, download and install the client here:
Microsoft Remote Desktop
Windows 64-bit
Once you’ve installed it, follow the steps below:
- From the main page of the client, also known as the Connection Center, tap Subscribe.
- Sign in with your user account (full email) when prompted.
- The resources will appear in the Connection Center grouped by Workspace.
Once you have logged in you’ll see the same computer icon – click that to launch your session.
Staff using the WVD client must log off at the end of their session. Failing to do so may result in errors or issues with the WVD Remote Desktop Application or the applications that staff utilize within.
To log off of your WVD session, please follow the directions below:
1.) While on the WVD Desktop, click the Start Button.
2.) Find your Windows Profile & click on your name.
3.) Click “Sign Out”
*Clicking the “X” on the Premium Desktop Connection Bar will disconnect your WVD Session without logging you out. This can cause issues the next time you connect to WVD.
Troubleshooting:
If you notice that you are experiencing issues with WVD or the applications used within the client.
1.) Try logging out of your WVD session (directions above).
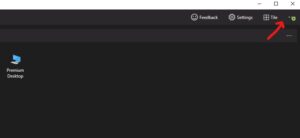
2.) If logging out and back in does not work, look for an update to your WVD client.
(if there is a pending update to your WVD client, you will likely see a green dot in the upper right hand corner when your open WVD. Example Below:
If you see a WVD update pending, please contact Helpdesk Support for assistance.