Access Requirements
An active YMCA account will be needed to add any printers from Microsoft Universal Print.
Adding Printers to your PC using Universal Print.
- Access the printer console on the computer.
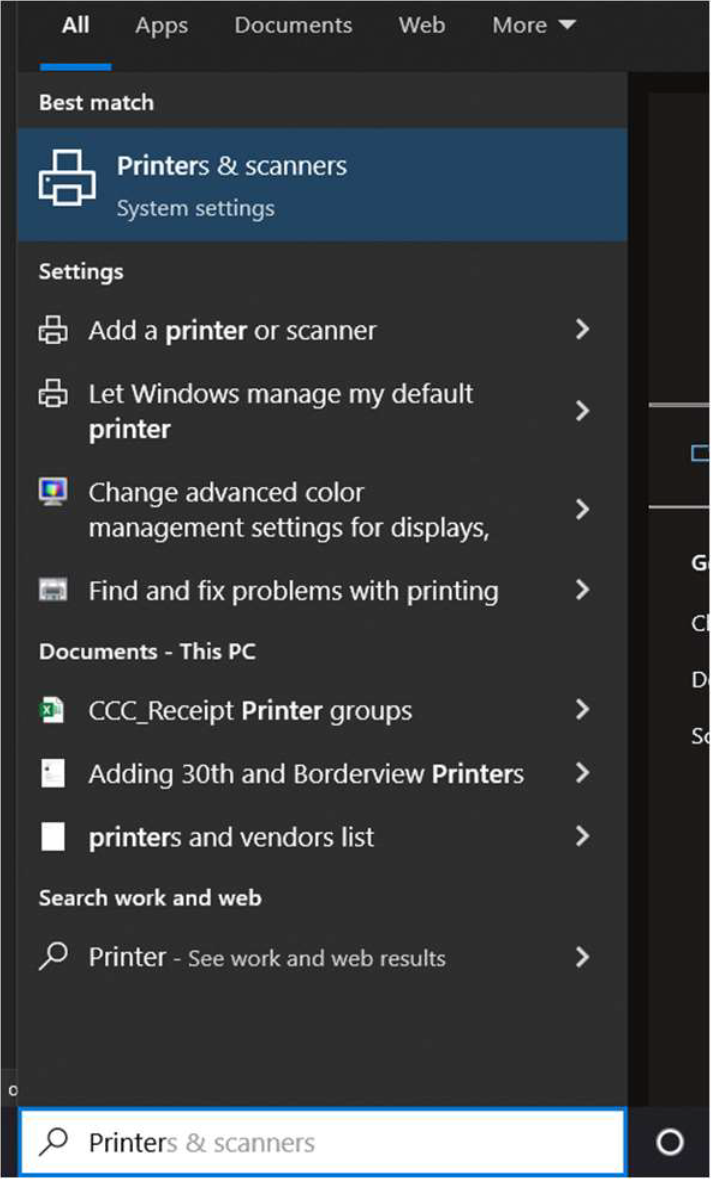
Type “Printers” into the Windows Search Bar & choose “printers and scanners”
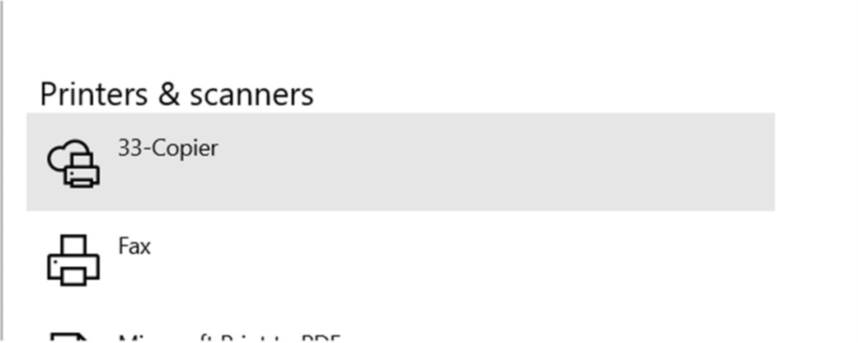
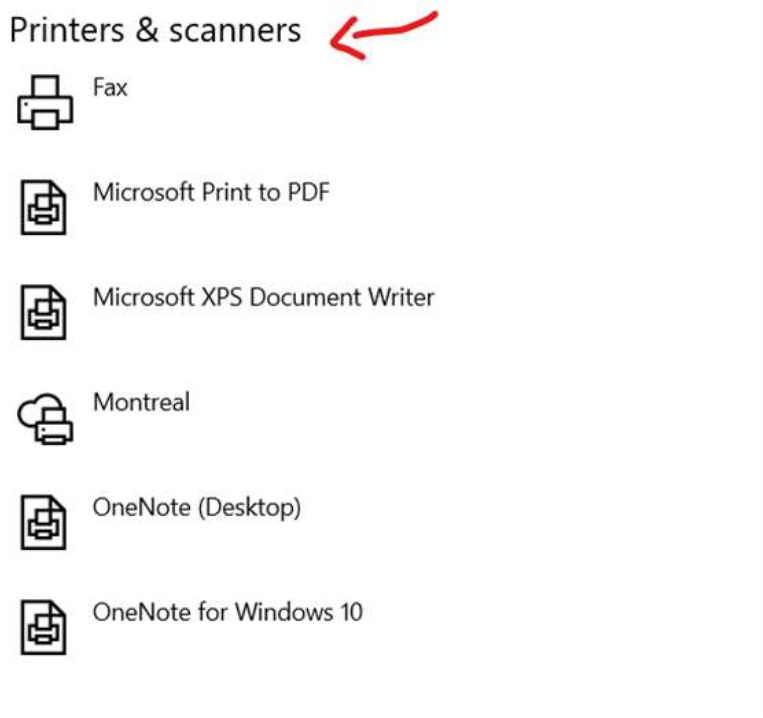
- Check to see if your printer is available here under “Printers and Scanners”
- If you do not see it there, you will need to add it, to do so, click “add a Printer or Scanner” at the top of the already open menu & choose Work or School Printer from the drop-down.
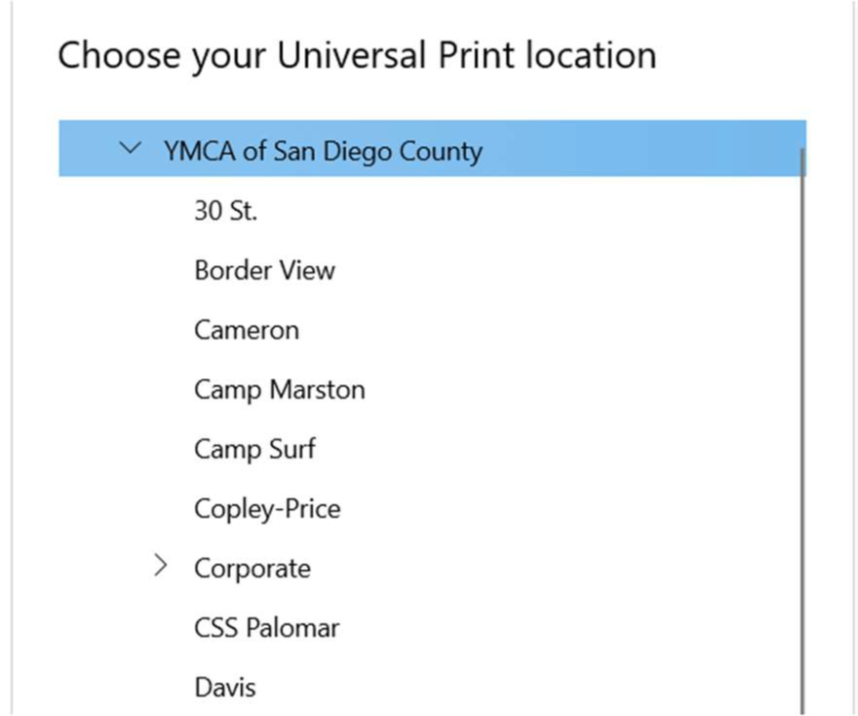
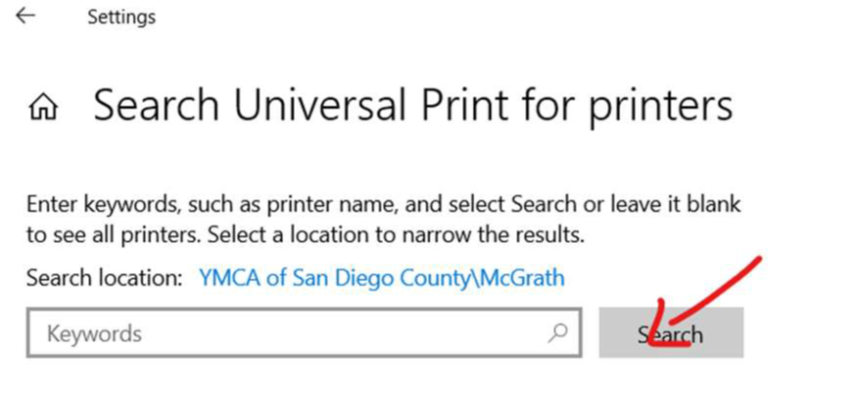
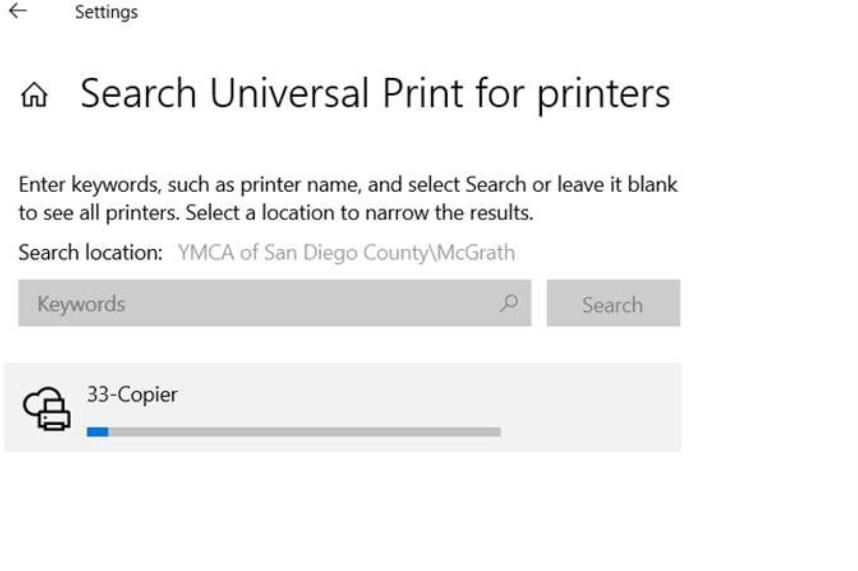
be sure you have the correct branch entered under Search Location. You can click Select a Search Location to change branches.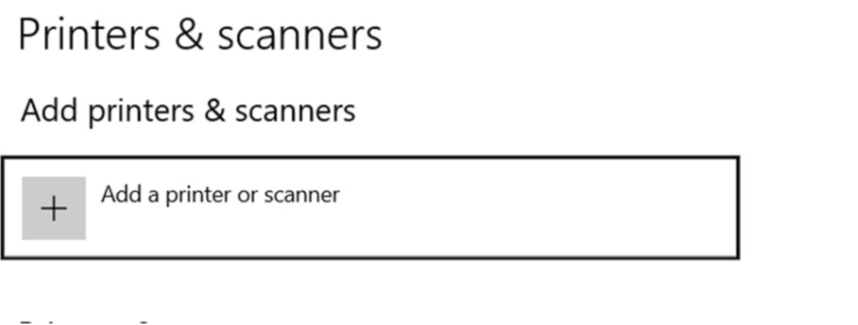


- it will begin its search

- It may find your printer there after this step, if it does go ahead and choose it to add it.
If you do not see it pop up, hit the link below that says “ Search Universal Print for Printers”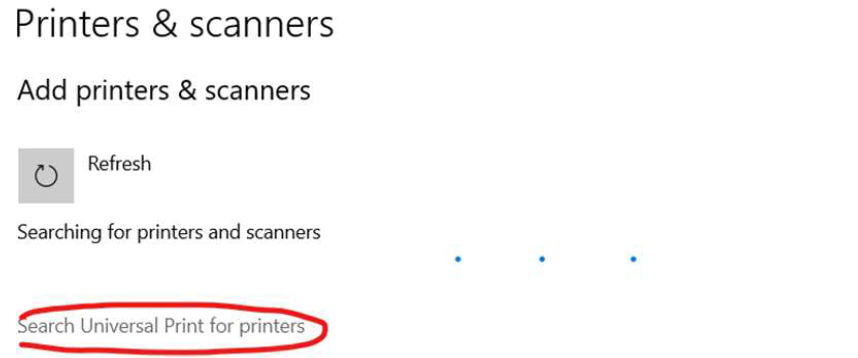
- Select a location for your branch and hit “OK”
- Hit “Search” button Again
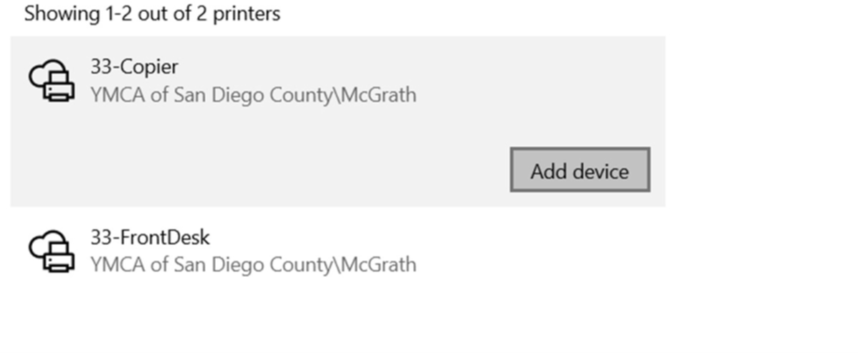
- You will see all devices at that branch that are capable of Universal print , click “add device” on the printer or copier you want to add.
- you will see it go through a connecting process, this may take a few moments.
- once done it will tell you it is “ready”

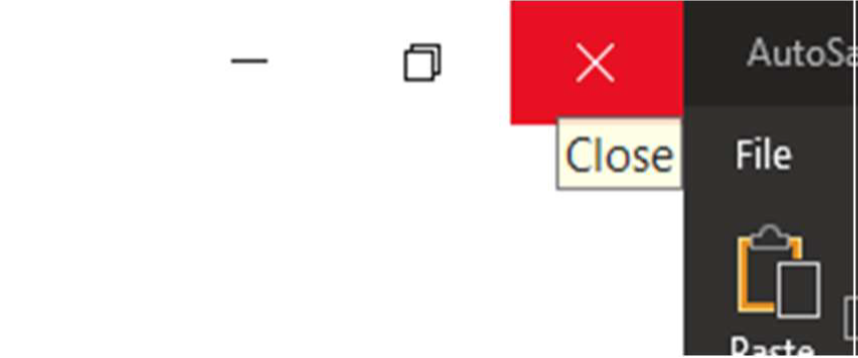
- Click the red X in the top right corner to close out the Printer Settings Window
- Next, once again type “Printers” into your windows search bar and choose “Printers and Scanners”
- You should now see your device available to use under “ Printers and Scanners”